How to Convert and Play DVDs in an iPad – Best Method You Should Know
If you just upgraded to the latest iPad Pro, which includes the most advanced technology for your work and entertainment. But how do you convert and import DVDs to iPad? There is no DVD slot available in an iPad, the only thing you should do is convert and play DVD instead.
Of course, the free DVD to iPad converter is the first choice you might take into consideration, such as HandBrake. But there are some restrictions, such as the optimal video parameters, DVD encryption and more. What should be the best method to convert and copy DVD movies to iPad? Just read on the article to find the answer now.


Part 1: How to Rip Any DVD to iPad Pro/Mini/Air
Whether you need to convert a commercial DVD, or choose the optimal file format for iPad Pro, Vidmore DVD Monster is always a nice option you can take into consideration. It not only rips any DVD to different iPad versions, but also keeps the complete DVD structure, video and audio tracks, menus, chapters, subtitles and more.
- Convert any DVD to video and audio formats, as well as different iPads.
- Advanced settings parameters for ripping the DVD to iPad as desired.
- Keep the original DVD structure, video/audio track, menus, tracks, etc.
- Hardware acceleration to convert DVD to iPad with 3X faster speed.
Step 1: Load DVD into your computer
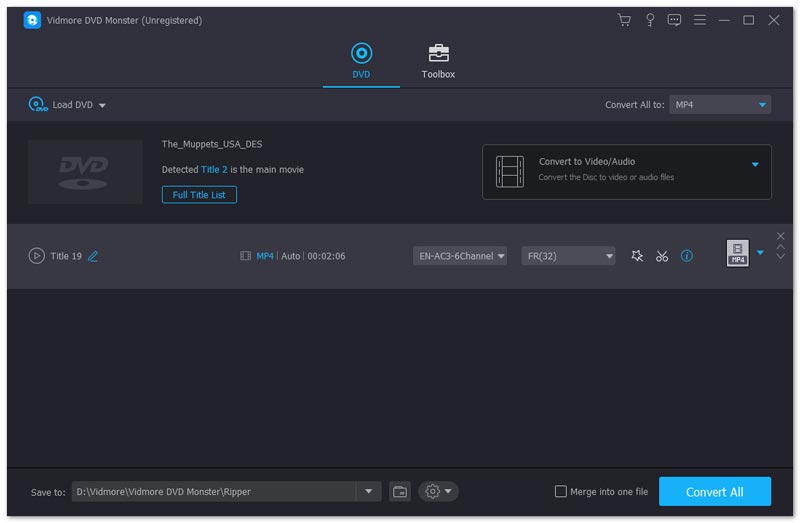
Insert the DVD disc into the computer and make sure the DVD is readable. Download and install the DVD ripper, launch the program on your computer and click the “Ripper” option to extract movies from DVD.
Step 2: Select the DVD titles to convert
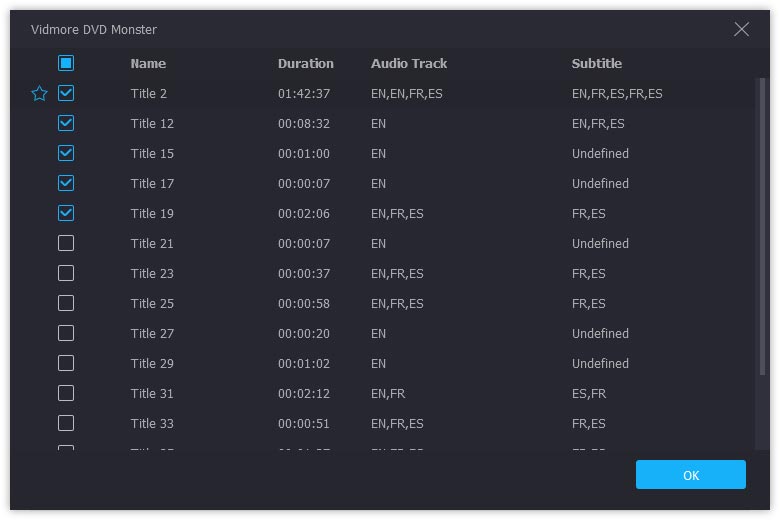
When the DVD ripper detects all the DVD titles, click the “View/Select Title” to locate the files you want to convert. You can choose the longest duration as the main DVD title to convert the files.
Step 3: Choose the iPad Pro as output
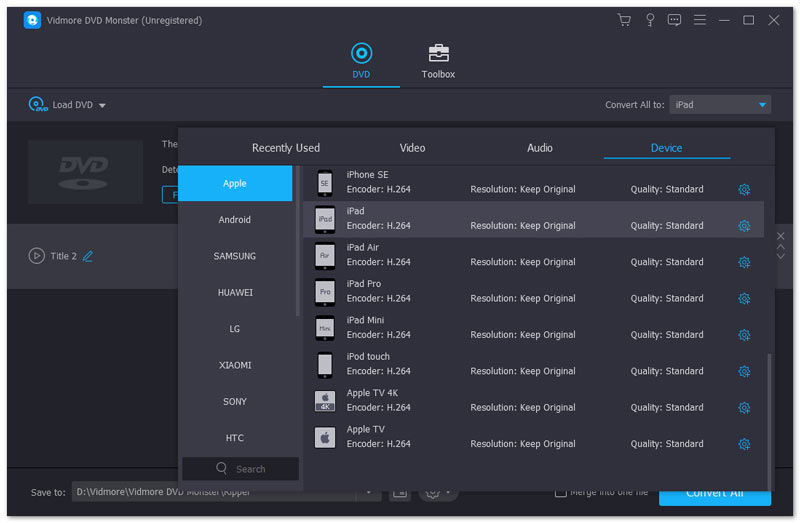
Click the file format button and choose the “Device” to “Apple” to “iPad Pro” to convert DVD to iPad Pro. Of course, you can also choose the other iPad versions, such as iPad Mini or iPad Air.
Step 4: Edit the output video files
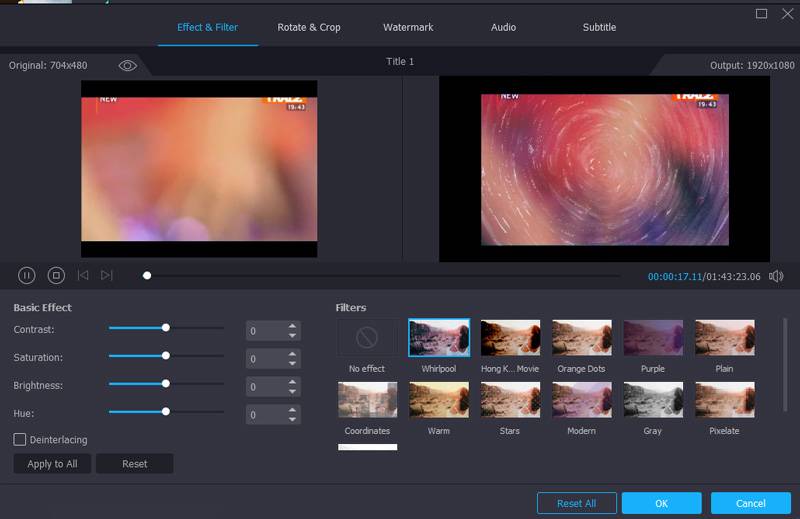
In order to make the movies from DVD more attractive, you can also click the “Edit” button to adjust the “Filters”, “Basic Effects”, “Add Segment” and even “Merge into one file” accordingly.
Step 5: Convert DVD to iPad Pro
Go to the “Settings” option to choose the destination folder and other ripping settings. Click the “Rip All” button to extract the DVD movies as the optimal iPad Pro video format.
Part 2: How to Convert DVD to iPad via HandBrake
When you need to convert DVD to iPad for free, HandBrake is a desired DVD ripper to extract the movie files from DVD. It is one of the most popular free programs that available both for Mac and Windows. Just take the HandBrake for Mac as an example; you can learn more details as below.
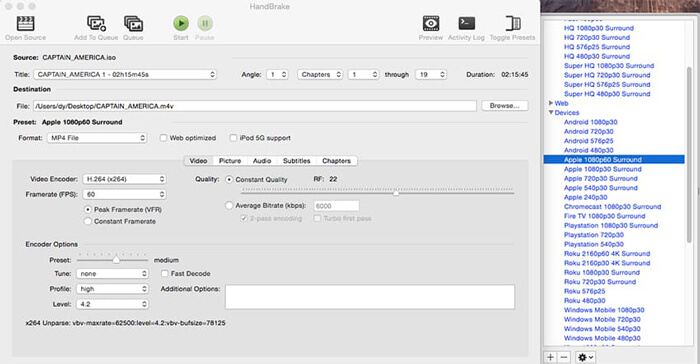
Step 1: Run the HandBrake on your computer and insert your DVD into your Mac computer. The program is able to start scanning the DVD, which might take minutes to scan the whole disc.
Step 2: You can set the destination folder for the videos that you can use for your iPad. Moreover, you can also modify the video codec, file formats and more other parameters.
Step 3: Click the “Toggle Presets” button at the top of the HandBrake window. In the drawer, you can choose the limited iPad preset, but the “iPad Pro” preset is not available.
Step 4: Press the “Convert” button to start the DVD to iPad conversion. The encoding time depends on the speed of your computer and the duration of your video file.
Part 3: How to Copy DVD Movies to iTunes
Once you have converted DVD to iPad, you should transfer the files from the computer to your iPad Pro. iTunes is the default method to transfer the videos from DVD to iPad. When you upload the videos to iTunes, you can play the DVDs on your iPad Pro now. If you can't play those videos on your iPad, there are ways to get around that, too.
Step 1: Launch the iTunes on your Windows or Mac, you can choose the “File” to “Add to Library” to locate the converted DVD movie in a file or folder on your computer.
Step 2: To sync the DVD video, click the content type that you want to sync under the settings on the left side window. On the right panel, check the option for “Sync Films” and hit “Sync” at the bottom.
Conclusion
When you need to convert DVD to iPad, it should be the ultimate guide you should never miss. The article explains the methods to convert homemade DVD and commercial ones, which you can copy and import to iPad via iTunes on your computer. More queries about iPad/iPhone converter and how to convert and rip DVD to your iPad, you can leave a comment in the article.
