How to Record Lync Meeting with High Quality
Microsoft Lync allows people to have online meeting, video or audio conversation and you are able to record a Lync Meeting to capture video, audio, instant messaging (IM), screen sharing, PowerPoint slides, whiteboard, and polling. Don’t how to record Lync Meeting on your computer? Discover the solutions here to learn how to record Lync Meeting with ease.


Part 1. Basic Way to Record Lync Meeting with Its Built-in Recorder
The direct way to record Lync Meeting is to use it built-in capture tool. But you need to know that it can only satisfy your basic recording needs. If you need more recording and editing functions, you’d better turn to a professional screen recorder. Here’s how to do:
Step 1. Click More Options, and then choose Start Recording.
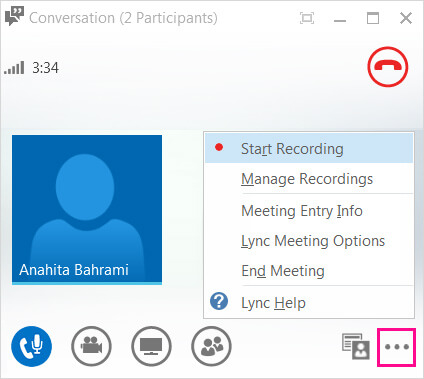
Step 2. Find the controls at the bottom of the meeting to pause, resume, or stop the recording.

Step 3. When you’re done, click Stop Recording and Lync will automatically save the recording in MP4 format.
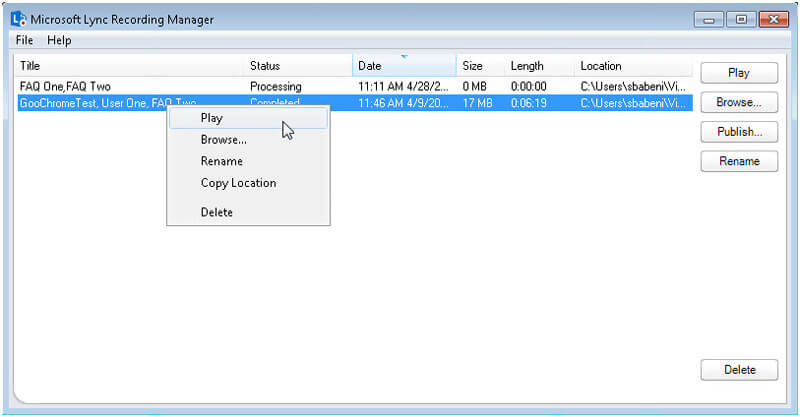
Step 4. Choose Manage Recordings by hitting More Options. Then, you can see all the recordings here. To play it, just right click on the recorded file and then hit Play. You can also browser, rename, delete or copy the file location.
Part 2. Professional Way to Record Lync Meeting in High Quality
To record Lync Meeting in high quality, you will need a professional screen capturing tool – Vidmore Screen Recorder to help you capture the image and sound from Lync Meeting. It can record all your screen activity, gameplay, webcam videos, online lectures, etc. Also, it has the ability to grab the audio from system sound and microphone. What’s more, it has a user-friendly interface, so it would be easy to use. Once you have it installed on your computer, you can follow these steps to record your Lync Meeting.
- Record a Lync Meeting with any screen size.
- Record any audio from the Lync Meeting, as well as your voice from microphone.
- Take a screenshot of the whole screen or the Lync Meeting window.
- Add text, arrows, shapes, mouse area effects and mouse click to your recording.
- Work with Windows 11/10/8.1/8/7 and Mac OS X 10.10 or above.

Step 1. Launch Vidmore Screen Recorder
Run the Lync Meeting recording application on your computer and select Video Recorder on the main interface.

Step 2. Select video recording region
To record the full Lync Meeting, you can choose the Full option. If you prefer to record a specific area, click the Custom option to customize your recording region.
If you need to record the audio from the Lync Meeting, enable System Sound, Microphone, or both.

Step 3. Configure output settings
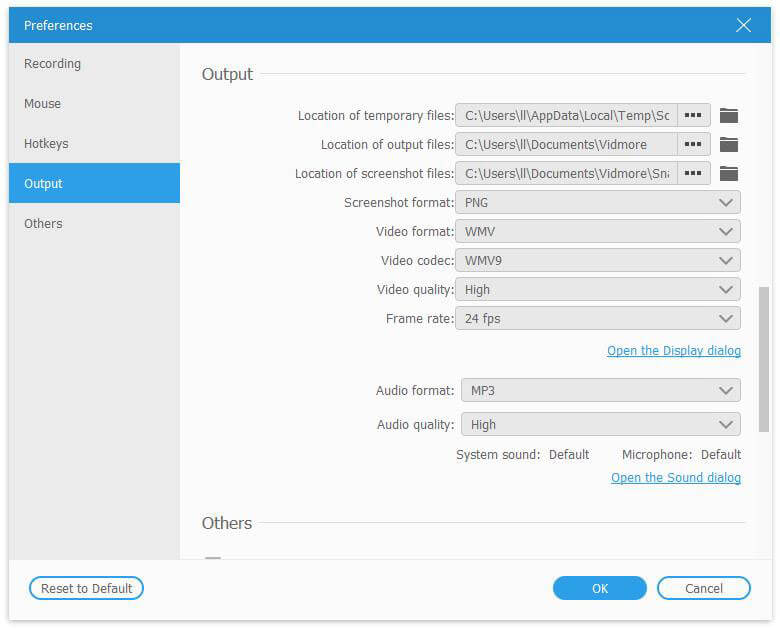
Find and click Record setting and choose the Output tab. By default, the output format is WMV. You can also select MP4, MOV, F4V, TS, AVI or GIF. Also, you can change video quality and frame rate.
Step 4. Start your Lync Meeting recording
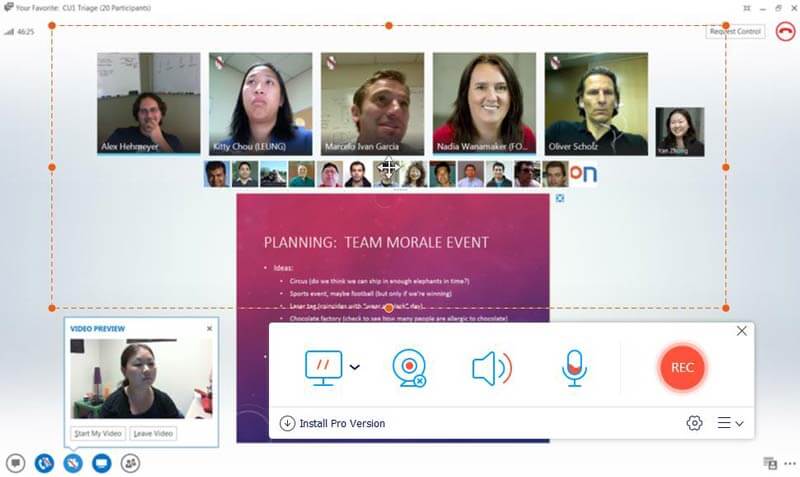
Now, click REC to start recording your Lync Meeting. While recording, you can edit your recording with real-time drawing tools and take screenshots.
Step 5. Save the recording
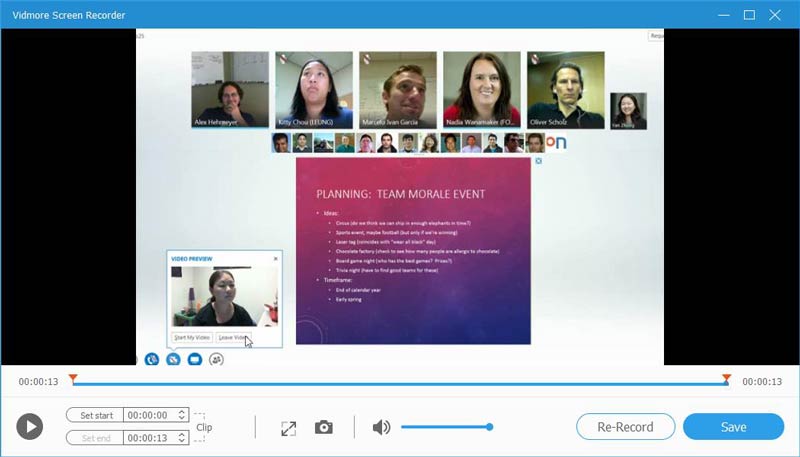
When the meeting is over, just click the Stop button to stop the recording process. Then, you can preview or trim the recording if necessary. Next, click the Save button to save your recording.
Apart from recording Lync Meeting, you can also use this software to record a Zoom meeting, WhatsApp Video Call, GoToMeeting.
Part 3. How to Record Lync Meeting Online
If you prefer to use an online service to capture Lync Meeting, you can try Vidmore Free Online Screen Recorder. As its name suggests, it is capable of capturing any area of your screen online for free. You are able to record Lync Meeting in full screen or selected area, and capture audio from system sound, microphone, or both. It is totally free without any time limitation, so you can feel free to use. Follow the steps below to start your
Step 1. Open https://www.vidmore.com/free-online-screen-recorder/ and hit the Launch Free Recorder button at the top of this web page to launch it. For the first time using, you need to install a launcher to activate this service. After activation, you will enter into the application.

Step 2. Before recording, you can preset the video/audio output format, frame rate, video quality, etc.

Step 3. Then, you can customize the area that you want to capture. Next, go to Lync Meeting and then click the REC button on the recording control bar to start recording.
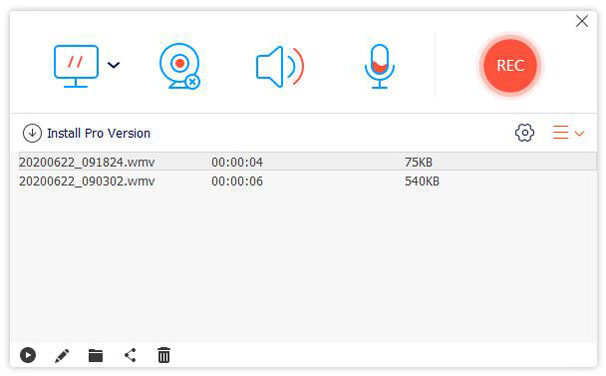
Step 4. When the meeting is over, click Stop to stop the recording process. You can preview the recorded file and save it to your computer. In the recording history window, you can rename, play, share and delete any file directly.
Part 4. FAQs of Recording Lync Meeting
1. How to playback a recorded Lync Meeting?
Lync shows a message when the recording is done. You can click the alert to open Recording Manager. If you miss that, click Tools on the Lync main window, then Recording Manager. In the Recording Manager window, click your recording to highlight it and then click Play on the right side of the window.
2. Where are Lync Meeting Recordings saved?
Recordings are saved in the Videos/Lync Recordings folder on your computer.
3. Can I set up a Lync Meeting by using Outlook 2013?
You can use Outlook 2013 or Outlook Web App to schedule a Lync meeting. When you add a Lync meeting, a link used to join the online meeting is automatically added to your meeting request. If you don’t use an Outlook program (or Windows), you can set up new meetings by using Lync Web Scheduler.
4. How do I rename a Lync Meeting recording?
To rename a recording, click Start > All Programs > Microsoft Lync > click Microsoft Lync Recording Manager. Then, find the Lync Recordings tab. Choose a recording, and then click Rename. Type a new name, and the press ENTER.
After going through the three easy ways on recording Lync Meeting, you can choose one to start the recording. However, if you are looking for a more powerful tool with various features, Vidmore Screen Recorder is the winner.
