QuickTime Not Recording Audio: How to Screen Record with Sound on Mac
QuickTime not recording audio is like attending a discussion without a paper or pen to take notes. Without the necessary tools, you can’t capture what is being discussed orally and the important information. QuickTime not having the ability to capture the audio is like having a visual record but missing the vital auditory element. In this case, let us know the possible reasons why QuickTime is not recording audio and the remedies you can try to solve this problem. Moreover, check the best alternative you can try to record with sound if you want to avoid the inconvenience of trying many methods.

PAGE CONTENT
Part 1. Why Quicktime Player Not Recording Audio
Before we dive into the solutions to fix this concern, let us know first the reasons why the QuickTime player is not recording audio. Several possible factors may be the cause of QuickTime screen recording having no audio. Some of them are listed below:
- The QuickTime player you are using is still the outdated version and needs to be updated now. This could be the reason why its new features for audio and screen recording are not yet supported on your Mac.
- You did not select the built-in Microphone of your Mac as the default audio input device in the QuickTime settings.
- The QuickTime player is restricted to use the system’s microphone. You can remove this in the Systems Preferences.
- The sound speaker volume on your Mac is too low, making QuickTime not properly acquire and record the audio during recording.
Part 2. How to Fix QuickTime Player Not Recording
In this post, we have listed the best tested-and-tried solutions on how to fix the issue of QuickTime not recording the sound. Read them below and see what solution is best suited for you, or you may try them all.
Solution 1. Update QuickTime Player
As mentioned above, one possible reason why your screen recording has no sound is that you might still be using the outdated version of QuickTime. QuickTime player is now one of the built-in applications of the macOS system. The best way to update it is by updating your macOS system, as this will automatically update the pre-installed apps, including the QuickTime player. So here’s the step-by-step guide on how you can update it.
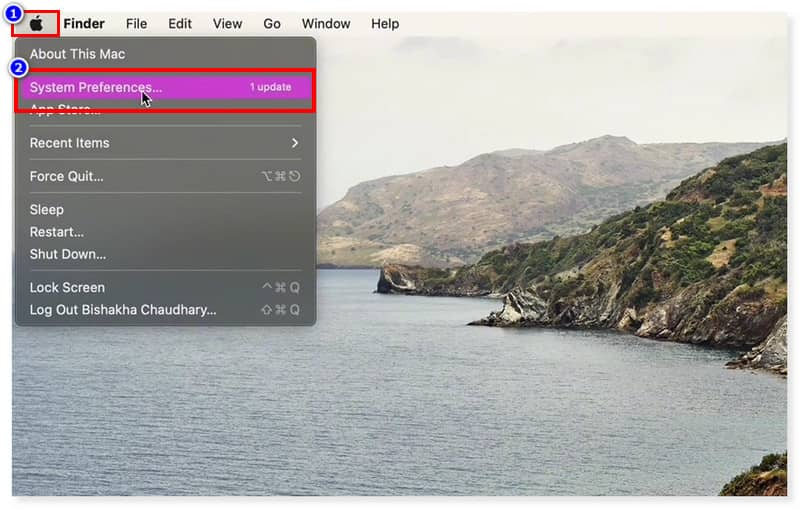
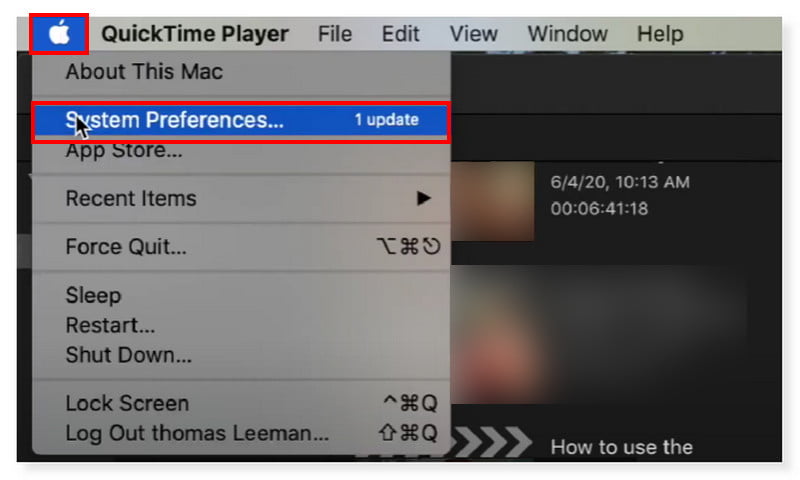
Step 1. First, click the Apple icon on the top left corner of your screen. Then, select System Preferences in the dropdown lists.
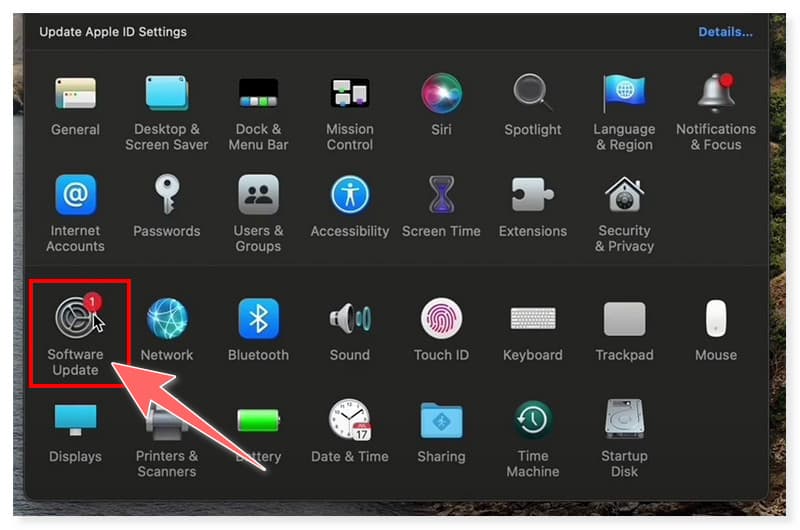
Step 2. In the System Preferences window, search for the Software Update and open it. Once you open it, you will see if your macOS system is up to date or if it needs to be updated.
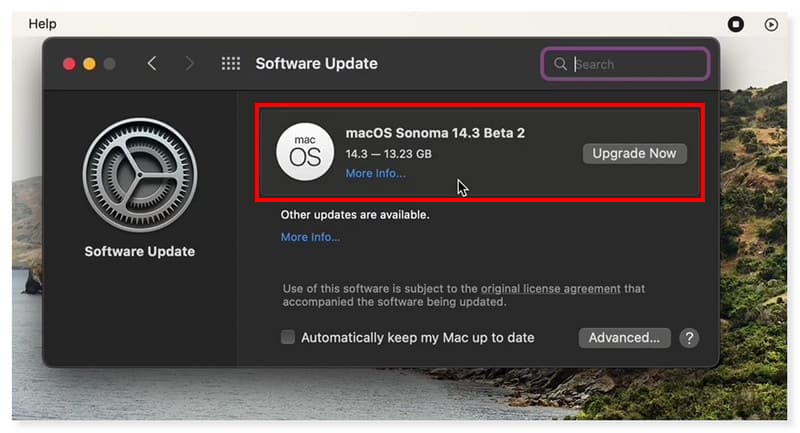
Step 3. If you see that it needs an update, just click the Upgrade Now button. Wait for the latest version to be successfully installed on your Mac. In that way, your QuickTime will also automatically be updated as well.
Solution 2. Check Microphone Settings
If you are having a problem with QuickTime screen recording having no audio, this might be because the software is not yet permitted to use the system’s Microphone. To allow that, you must check the Microphone Settings and enable QuickTime player to use it. Here’s how to do it:
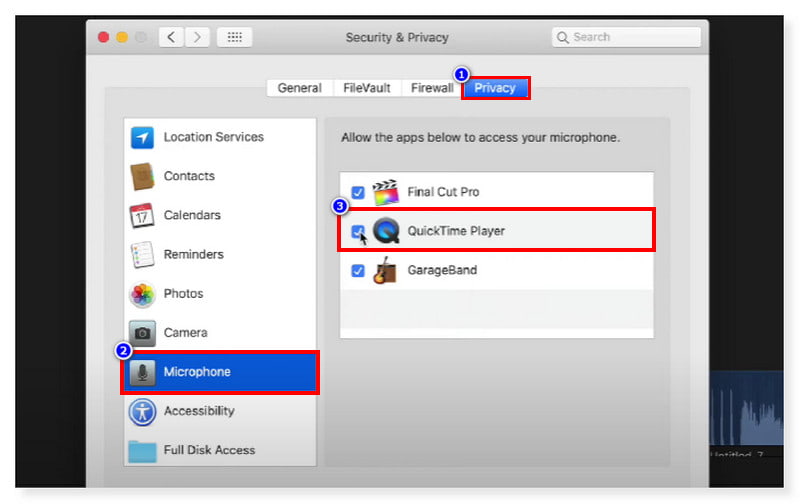
Step 1. Click on the Apple icon on the top-left corner of your Mac screen. Select System Preferences, then click the Security & Privacy > Privacy.
Step 2. Select the Microphone menu to show all the apps that can access it and have permission to use it. Tick the box beside QuickTime to permit it.
Step 3. Once done, open the QuickTime player and try to record audio on Mac again. You may try this method if QuickTime is not recording any sound.
Solution 3. Adjust QuickTime Settings
Another possible reason why QuickTime is not recording the audio is that the built-in microphone of Mac is not the default audio input device in the software. In that case, users have to adjust and manually select it in the QuickTime settings to enable the recording with sound. Read the steps below on how to check and modify the QuickTime audio settings:
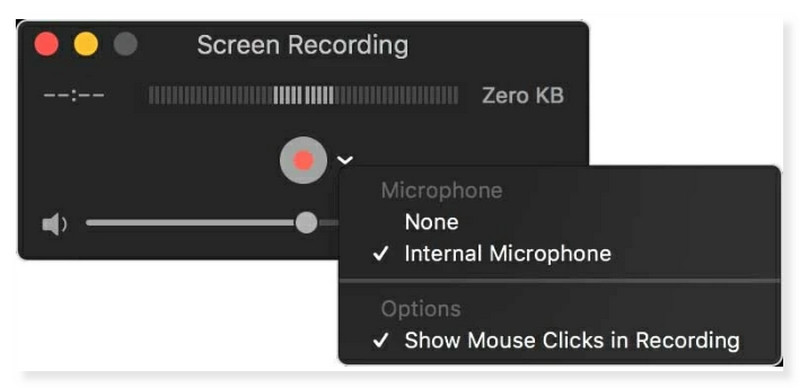
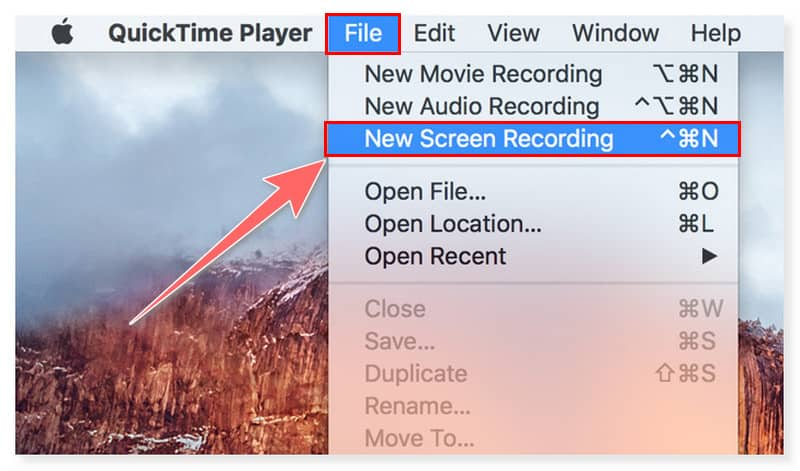
Step 1. Open the QuickTime player and select File > New Screen Recording. Next, click the dropdown arrow beside the Record button.
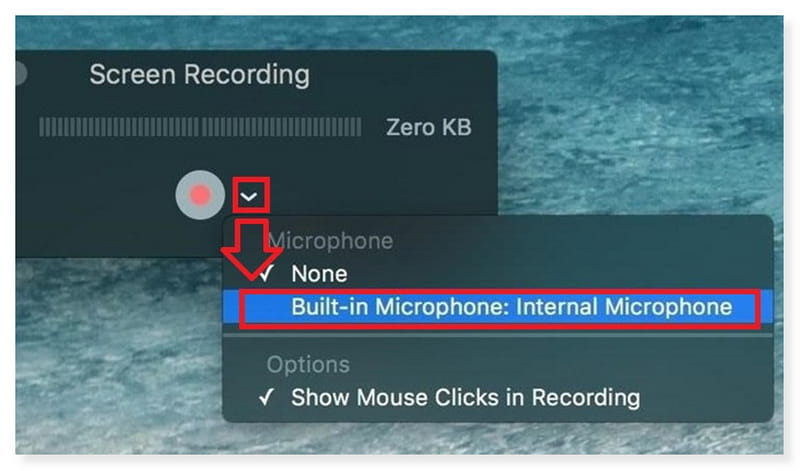
Step 2. In the Microphone section, select the Built-in Microphone: Internal Microphone. After that, hit the red Record button to start recording with sound.
Part 3. Alternative to QuickTime for Record Screen with Audio on Mac
Suppose you do not want to enter the hassle of trying any methods to fix the issue of QuickTime player screen recording audio not working. Then, instead of stressing yourself about it, you may try to use an alternative screen recorder instead. Vidmore Screen Recorder is considered the best alternative to QuickTime to screen record on Mac. It is a powerful screen capture software good for recording your Mac screen, gameplay, webcam, taking screenshots, and recording with audio. It is built with an audio recorder that allows you to seamlessly capture any audio sources from the microphone and system sound. Moreover, it will save your screen and audio recording in widely-used formats for easy access to playback on any device in high digital quality. Here is the step-by-step guide on how to screen record on Mac using this tool:
Step 1. Download and install the Vidmore Screen Recorder on your Mac. After that, launch the software.
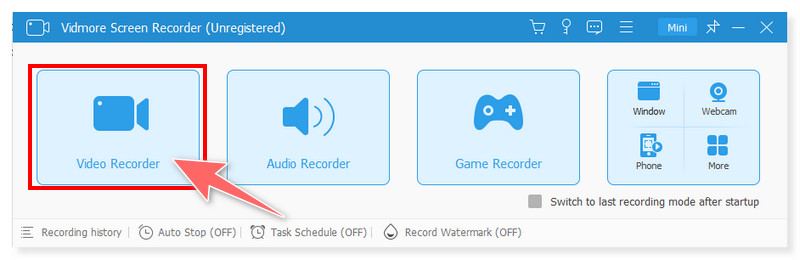
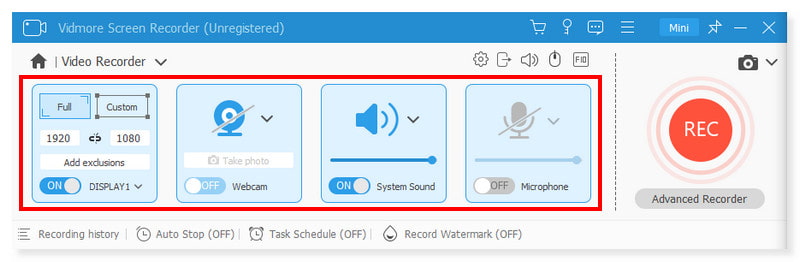
Step 2. Once you open it, you will see all the options you can do using this tool. Select the Video Recorder to screen record.
Step 3. Turn ON the System Sound and Microphone, and adjust the volume to capture the sound loud and clear. You may also turn ON the webcam if you will need it in the recording.
Step 4. Once done, click the big Record button on the right side to start the recording. And that’s it! Enjoy hassle-free screen recording on your Mac with this QuickTime Player alternative.

Part 4. FAQs on QuickTime Player Not Recording Audio
Why does my Mac screen recording have no sound?
There could be many possible reasons as to why your screen recording has no sound. Some of these are:
- The screen recorder you used does not have permission to use the microphone on your Mac computer.
- There might not be any audio source to record.
- The microphone input level is low, so the screen recorder you are using can’t capture the audio.
- The speaker volume is low, so the sound can’t be captured properly during screen recording.
How do I get QuickTime to record audio on my computer?
Step 1. Open the QuickTime Player on your Mac. Click the File tab and select New Audio Recording on the dropdown options.
Step 2. In the pop-up Audio recording, click the Options menu. Then, adjust the recording settings according to your preferences, such as the Microphone to use and the Quality of the recording.
Step 3. You have to adjust the volume level to hear the audio you are recording. Once done, tick the Record button to start recording.
How do I enable audio capture on my Mac?
Several apps and websites can access and record the screen and audio on your Mac. But you can decide which websites and apps are allowed to record your screen and audio. Here’s how to do it:
Step 1. In the Apple icon menu, select the Systems Settings, scroll down, and click Privacy & Security in the sidebar.
Step 2. Select the Screen & System Audio Recording on the right side. For each app listed, you can turn on or off their ability to record.
Step 3. You can allow the apps to record both your screen and audio or just the audio. You can add more apps for recording by clicking the Add button below the list.
Conclusion
This post has provided some of the useful solutions you can try when QuickTime not recording audio as well as the best alternative to QuickTime in screen recording. Instead of entering the hassle of trying many methods to see which will work for you, you may switch to Vidmore Screen Recorder. This recorder allows you to record any part of your screen and take screenshots any time you like during the recording. Moreover, you can record HD video and audio good for all types of content creators like YouTubers, vloggers, gamers, and lecturers.