Effective Ways to Use Davinci Resolve Noise Reduction
Excessive background noise can make the content seem unprofessional. Reducing noise is essential to enhancing the quality of the final production. Fortunately, DaVinci Resolve provides a powerful solution for enhancing audio quality in video projects. In this post, you will learn how to use DaVinci Resolve’s Noise Reduction and Noise Gate features. These tools will allow you to manage and reduce unwanted background noise effectively.

Before we get started, check the table below for a quick evaluation of the tools:
| Methods Used | Effectiveness | Level of Difficulty |
| Vidmore Video Converter | Uses AI to automatically and effectively analyze and reduce background noise. | Hassle-Free |
| DaVinci Resolve | Achieve background noise reduction through machine learning and manual adjustments. | Relatively Complicated |
PAGE CONTENT
Part 1. Does DaVinci Resolve Have Noise Reduction Function
Before getting into the technical side, let’s first answer the question: Can DaVinci Resolve remove background noise? By chance, the answer is YES!
The Noise Reduction feature is part of DaVinci Resolve’s all-inclusive color correction and enhancement tools. This feature allows users to significantly enhance the audio tracks’ quality by reducing unwanted noises. It analyzes the audio to determine noise patterns and suppress these elements without affecting the main audio. Additionally, the effectiveness of the feature can be adjusted, providing users control over noise removal. This extensive feature is beneficial for refining audio to ensure a cleaner sound.
Part 2. How to Use DaVinci Resolve to Denoise Video
At this point, it is important to understand the tutorial section to denoise video effectively. As mentioned, DaVinci Resolve comes with powerful post-production tools, including noise reduction features. Denoising video is essential to improving the auditory clarity of videos by removing unwanted noises. In this section, we will cover two approaches to eliminating these unwanted noises using the Noise Reduction and Noise Gate features.
Method 1. Noise Reduction
The Noise Reduction feature is highly functional when dealing with constant background noises. This feature is designed to help users clean up audio by reducing these unwanted sounds. Below is a comprehensive guide to help you get started with DaVinci Resolve’s noise reduction.
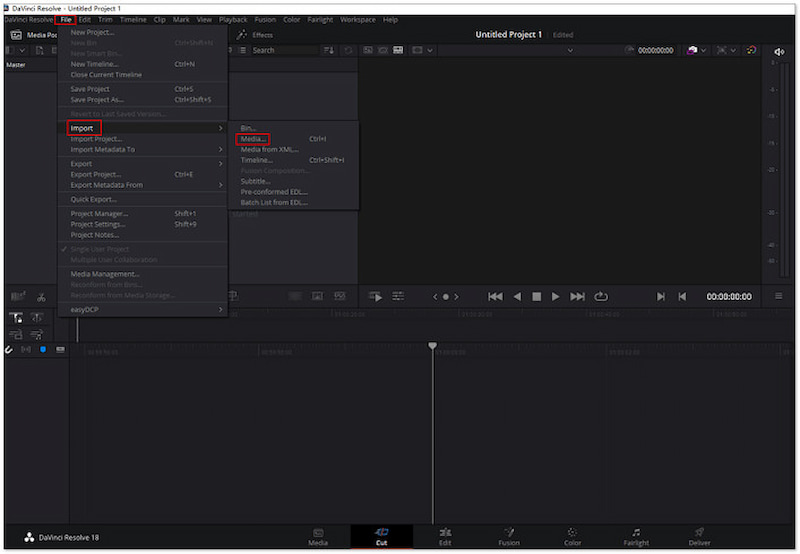
Step 1. Open DaVinci Resolve and add the video you want to remove background noise from. Simply head to the File tab, select the Import option, and click Media.
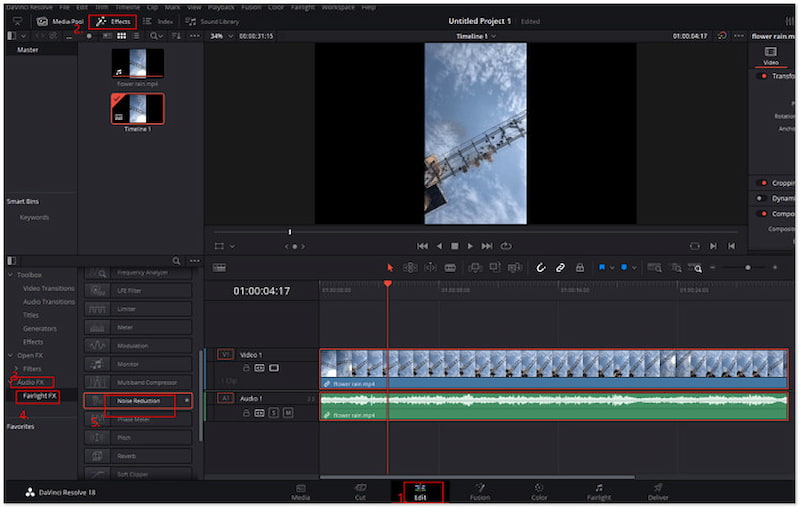
Step 2. Move to the Edit tab and select the Effects option from the top menu. Locate the Audio FX dropdown menu and click the Fairlight FX option. Drag the Noise Reduction from the available selection and drop this effect onto your video.
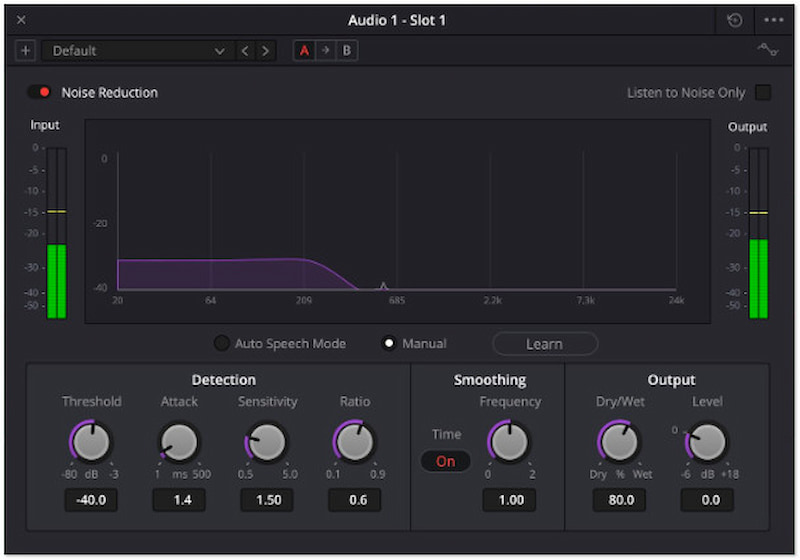
Step 3. Click the Manual and Learn options to bring up the noise reduction options. Use the Volume Knobs to control the level of noise reduction as needed. Once satisfied with the reduced noise, start rendering the video with the removed background noise.

Method 2. Noise Gate
Another DaVinci Resolve audio background noise removal option is to use the Noise Gate feature. This impressive feature effectively manages and minimizes background noises. It is particularly beneficial when dealing with recordings that contain unwanted sounds.
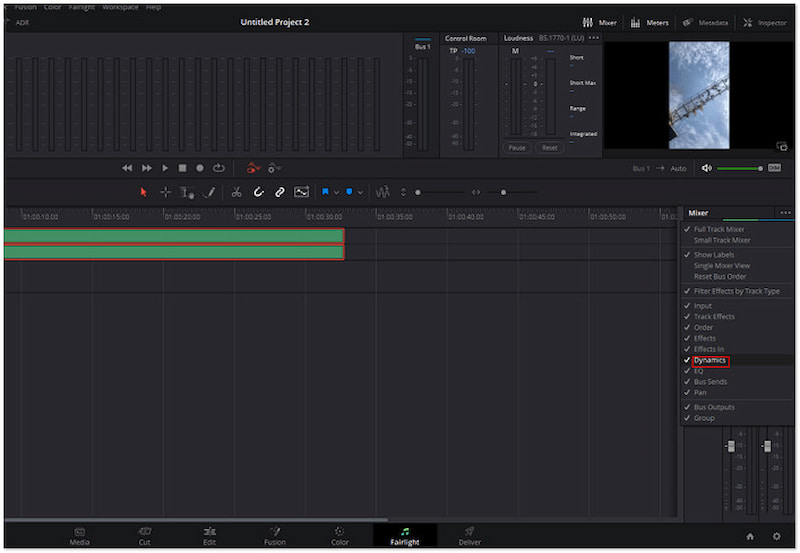
Step 1. Start by uploading the video you want to reduce background noise. Once loaded, direct yourself to the Fairlight tab to access the audio editing tools.
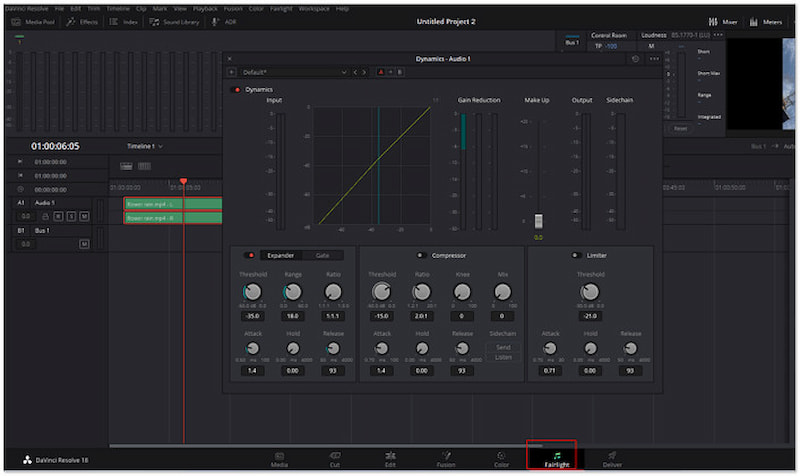
Step 2. On the right side of the Fairlight tab, locate the Mixer section. Click the three dots to explore the Mixer and select the Dynamic option. At this point, click the Dynamic area twice to open the dynamics processing window.
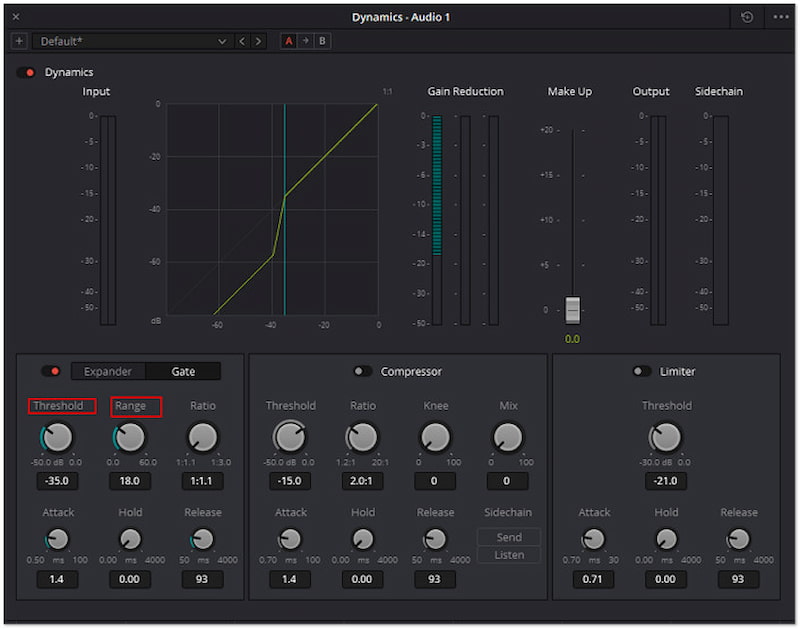
Step 3. In the Dynamic window, click the Gate option to access and adjust the audio gate settings. This allows you to set Thresholds, Range, Ratio, and other parameters to effectively suppress unwanted background noise.
The Noise Reduction and Noise Gate features provide comprehensive solutions to remove background noise from audio. The Noise Reduction feature offers a detailed approach to analyzing and filtering out unwanted noise patterns. Meanwhile, the Noise Gate feature allows setting thresholds to control the volume of audio signals below a certain level, which helps to reduce background noise. Now, a small heads-up. Being a powerful tool for reducing background noises, it might be challenging to master noise reduction tools quickly.
Part 3. Easier Alternative to DaVinci Resolve Noise Reduction
If you’re unfamiliar with DaVinci Resolve and it doesn’t seem easy, there are other options to explore. Vidmore Video Converter is among the alternatives you could consider for this purpose. This extensive tool boasts over 20+ editing tools, including the Noise Remover feature. Not to mention, it uses advanced AI techniques to analyze the audio of the video to identify and remove unwanted noise. What’s more, it allows you to adjust volume and delay to achieve optimal sound quality and synchronization in your projects. It aims to produce high-quality sounds and ensure all components are integrated properly into the content.
Here’s how to remove background noise using DaVinci Resolve alternative:
Step 1. Beforehand, get the free download of Vidmore Video Converter. Install the versatile software and allow the installation process to finish.
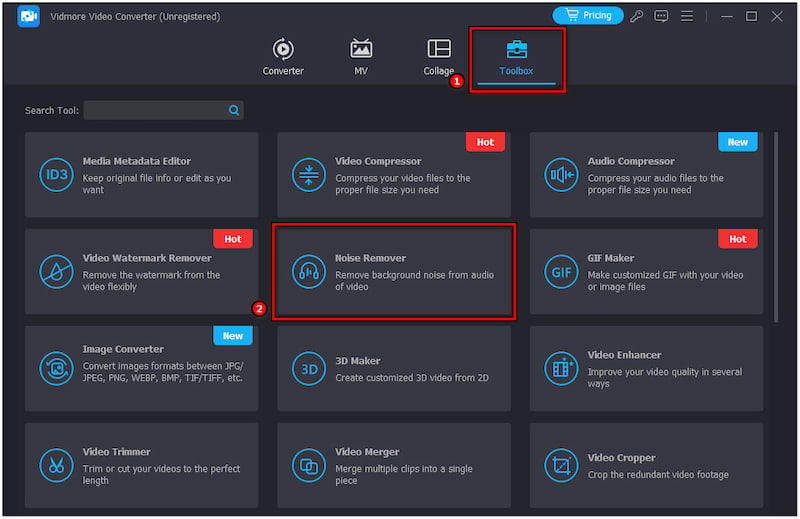
Step 2. Once the installation is finished, launch the Vidmore Video Converter on your computer. Proceed to the Toolbox tab and look for the Noise Remover feature.
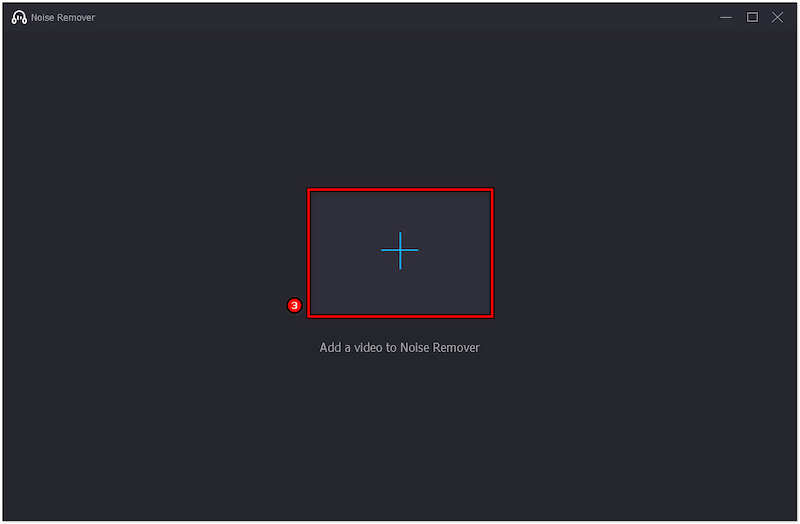
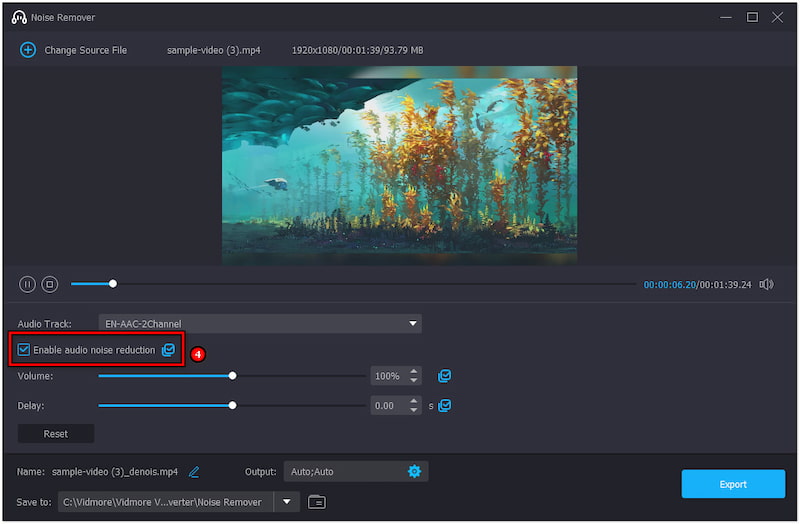
Step 3. In the Noise Remover window, click + to add the media file you want to remove noise. Afterward, you will be greeted with a clean and straightforward interface.
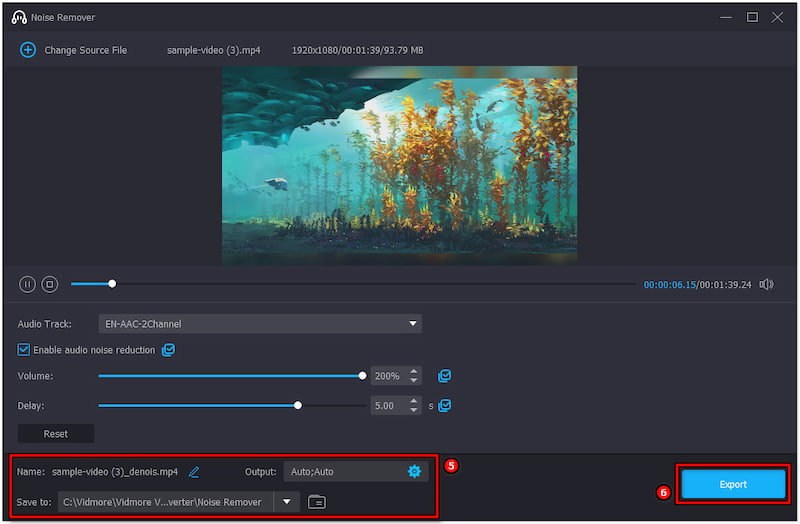
Step 4. Check the Enable audio noise reduction box to apply it to the audio track. If needed, adjust the Volume and Delay sliders for optimal results.
Step 5. Once done, name your file, choose a compatible format, and select a path destination. Finally, click the Export button to save the file with removed background noise.
Vidmore Video Converter provides an easy-going solution to reduce background noise from your media files. It is designed with a user-oriented interface, making it easier for users to apply noise reduction without needing extensive skills.
Part 4. FAQs about Davinci Resolve Noise Reduction
What is DaVinci Resolve audio background noise?
DaVinci Resolve provides powerful tools for managing audio background noise. You can use the Noise Reduction in the Edit tab and Noise Gate in the Fairlight tab to reduce unwanted noises.
How to reduce sound in DaVinci Resolve?
You can access the Edit tab and use the Mixer to reduce overall sound levels. Simply adjust the video’s volume directly using the volume knobs from Detection, Smoothing, and Output section.
What is the noise reduction threshold in DaVinci Resolve?
It is a setting that identifies the level at which noise reduction techniques are applied. It specifies the point below which audio is considered noise and thus targeted for reduction.
Conclusion
In conclusion, the Noise Reduction and Noise Gate features offer an effective way to improve project audio quality. This post provides a comprehensive solution on how to use DaVinci Resolve noise reduction to remove background noises. Given that DaVinci Resolve seems complicated to use, mainly for non-tech-savvy users, we highly recommend using Vidmore Video Converter as an alternative.