Speed Ramping: Learn How to Do Speed Ramping on Your Video
You can make fun of your video clips by replacing the original form. Others edit their videos by adding special effects and filters and varying the pace. Playing the segments again at varying rates affects ramping. The videos are captured at one frame rate and played back at another. It is the different presentation that shows the ramping effect. Because of this video impact, the completed video performance will be more captivating and exciting. Learn how to do speed ramping in Premiere using three steps.

Part 1. What is Speed Ramping?
The process of time remapping is another term for the filmmaking technique known as speed ramping. You may create a dramatic impact by accelerating or slowing down the video shot with one of the many different types of smartphones or UHD cameras. It works in the same way that the word ramp does. Meanwhile, the editing technician's primary contribution to the finished clip is processing the transition between the two distinct speeds. It can be silky and gentle. Alternately, it may also be sudden and choppy. The process of progressively increasing the pace of a video clip is known as speed ramping. When an action scene transitions between slow, average speed and rapid motion, a technique known as speed ramping is used. This technique can be seen in various action movies and sports films.
Part 2. How to Do Speed Ramping
The technique of gradually increasing the playback speed of a video clip over the course of its duration is referred to as speed ramping. You will learn how to make a gorgeous speed ramp in Adobe Premiere Pro and another application by following the steps in this video. It ranges from recording the appropriate footage to using advanced tips and techniques.
1. Premiere Pro
The Speed Ramp effect in Premiere Pro is straightforward to use. It enables you to alter the pace of your film in various areas by varying how fast or slow you want it. To become sophisticated, you may take advantage of the Speed Ramp. It has some additional complex features that offer you even more control over how your speed varies. Here we will demonstrate how to use Adobe Premiere Pro to produce a stunning speed ramp effect. You may use speed ramps to create seamless transitions between scenes in your next film, or you can use them to add a little flare to your production.
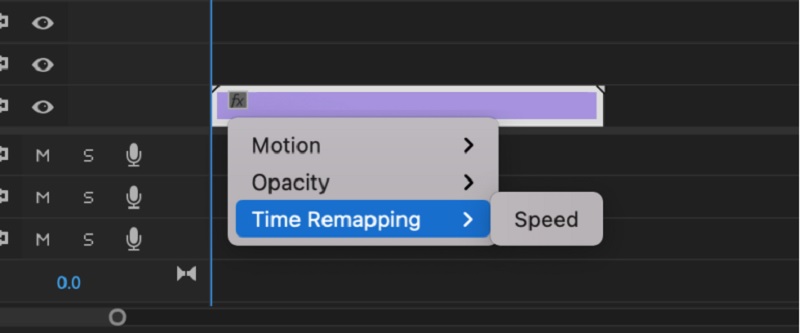
Step 1: To raise the height of the clip track in the timeline, click and drag the mouse in that direction. Click the Fx button on the clip, choose Time Remapping from the context menu, and adjust the speed.
Step 2: The clip's tempo may be adjusted by dragging this band up or down. If it was previously playing at a slower rate, raise the band to watch a clip at a regular time. The use of keyframes is required for the creation of a speed ramp. To achieve this, press the Command key with the Control key and then click the rubber band. If you add two keyframes to the clip, it may be cut into three distinct segments. Click and drag the central part up or down for fast or slow playback.
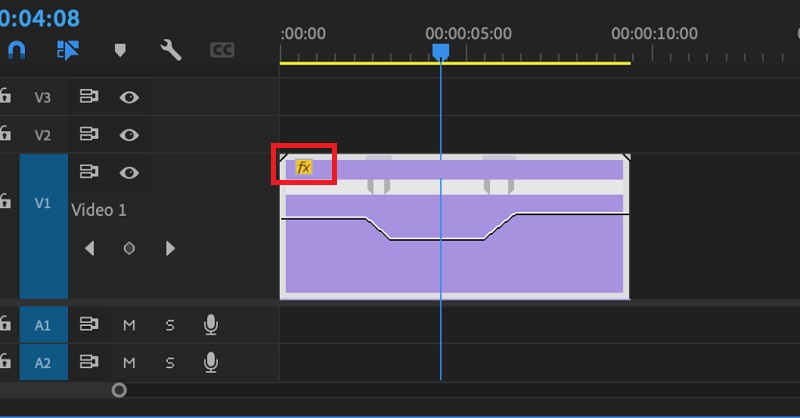
Step 3: Simply holding down the Option key while dragging the keyframe will move the whole keyframe. Try out various ramp-up times until you find one that works for you in terms of timing.
2. Vidmore Video Converter
You might try switching to different software, such as Vidmore Video Converter, if you struggled to make a speed ramp in Premiere Pro. If this is the case, you have the option to do so. It is a video speed editor with a straightforward user interface, which makes navigating the program much less complicated than other options. Users of this video editor can install the application on computers running either Windows or Mac operating systems.
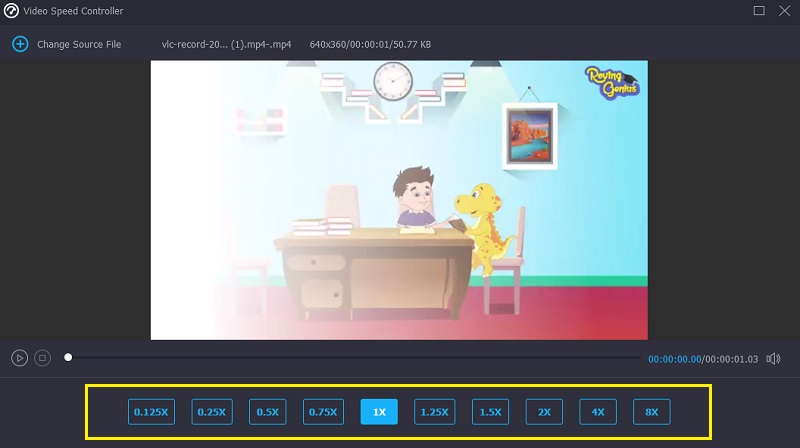
You can get the Video Speed Controller function with the assistance of Toolbox. This function consists of various speed settings that allow a movie to be played at speeds up to eight times its average pace. And this change to a progressively faster pace will take place in exactly one second. Aside from that, Vidmore Video Converter can adjust the settings of the video, such as the frame rate and resolutions. It is another valuable feature of this program. It is a more fundamental explanation of how this application's speed ramping feature works.
Step 1: Install the Vidmore Video Converter on your device, then start the program when you've permitted it to operate.
Choose the Video Speed Controller from the Toolbox menu to modify how fast the video plays. It lets you choose how quickly or slowly the action happens in your movie.
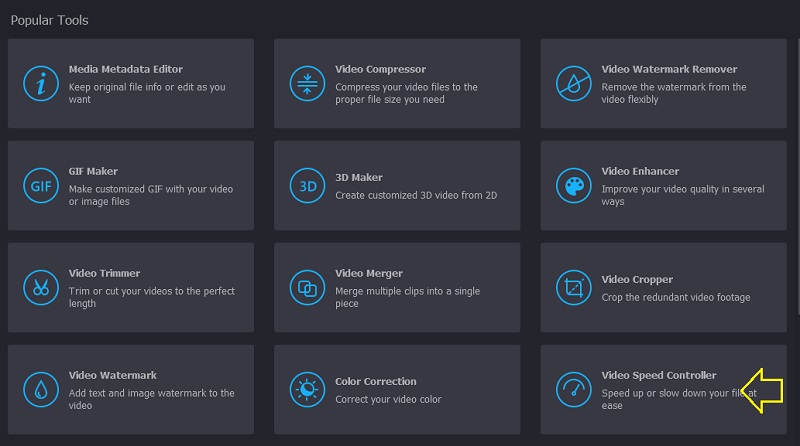
After selecting Video Speed Controller from the menu on the side of the screen, you will need to hit the Plus sign in the center of the screen.
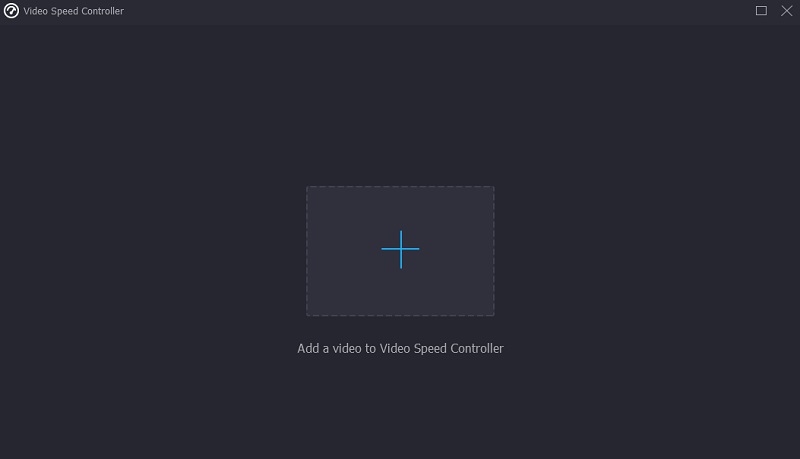
Step 2: Changing the video's playback speed is an option in the menu that appears after the movie has been completed. You may adjust the game's tempo and difficulty with the push of a button.
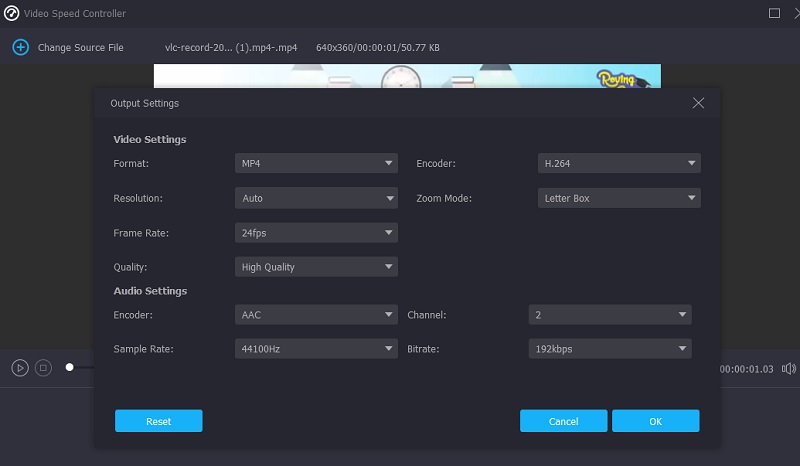
You may adjust the quality of your file in the Settings menu. You may accomplish this by pressing the tab. You may adjust the frame rate, the resolution, and other settings. You may proceed with the conversion if there are no plans to change these values shortly.
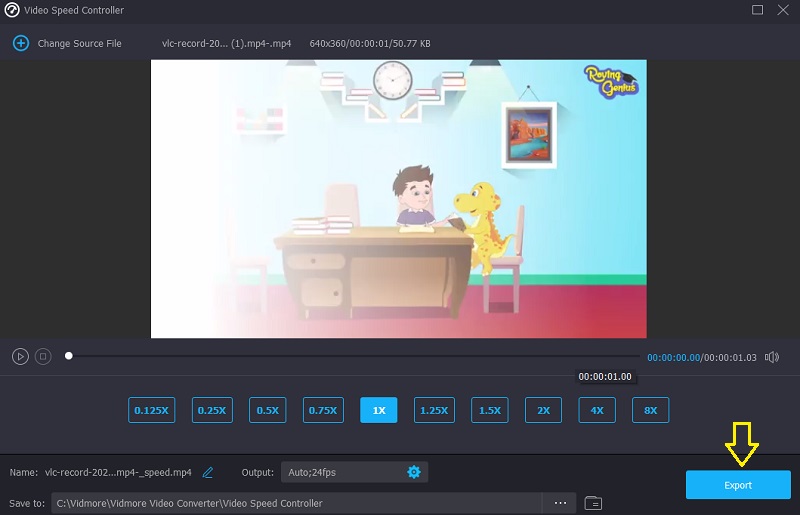
Step 3: Select Export from the menu that appears to begin the export process. After that point, you must wait for the procedure to finish before proceeding further.
Part 3. FAQs About Speed Ramping
Can I speed ramp a video on iMovie?
iMovie allows users to adjust the speed of any portion of a clip individually. You can choose whether or not to make a seamless transition in frame rates between the portion of the clip that contains the speed change and the remaining portion of the clip. You may choose a range in a clip in the timeline of the iMovie software on your Mac by holding down the R key and dragging across the clip while selecting the range.
In terms of speed ramping, what frame rate is ideal?
You should ensure that the film you utilize is taken at a rate of at least 60 frames per second.
What's better, 30 fps or 60 fps?
Pick the 60 frames per second option if you wish to record both fast motion and slow motion simultaneously. In such a case, you should shoot at a rate of 30 frames per second.
Conclusions
Speed ramping transition is achievable on Premiere in just three steps. In addition, some programs provide a more straightforward and effective method for modifying the pace at which a video plays. Along these lines, you can also try the Vidmore Video Converter.


