How to Create a Slideshow on Facebook in 3 Simple Ways
Nearly everyone these days connects to Facebook using a variety of devices and connection speeds. Users can create and share a Facebook slideshow to preserve special moments anytime. Even though you live far away, it's one of the best ways to tell your loved ones about your life. This post demonstrates how to make a slideshow on Facebook in just a few basic steps.

PAGE CONTENT
Part 1. How to Make a Slideshow on Facebook
Sharing images and videos has become essential in today's society. Facebook has introduced a function called Create a Slideshow to assist you in entertaining and daringly sharing unique occasions in your life. You can quickly turn your Android or iPhone images into a slideshow and share it with others using Facebook Slideshow. Follow the straightforward steps below to learn how to do a slideshow on Facebook:
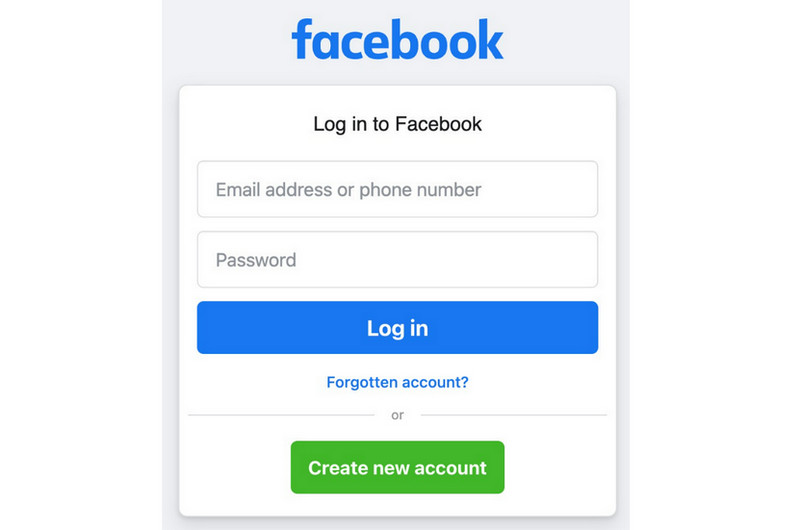
Step 1. Open Facebook on your desktop and log in to your account. Add your email address or mobile number together with your password.
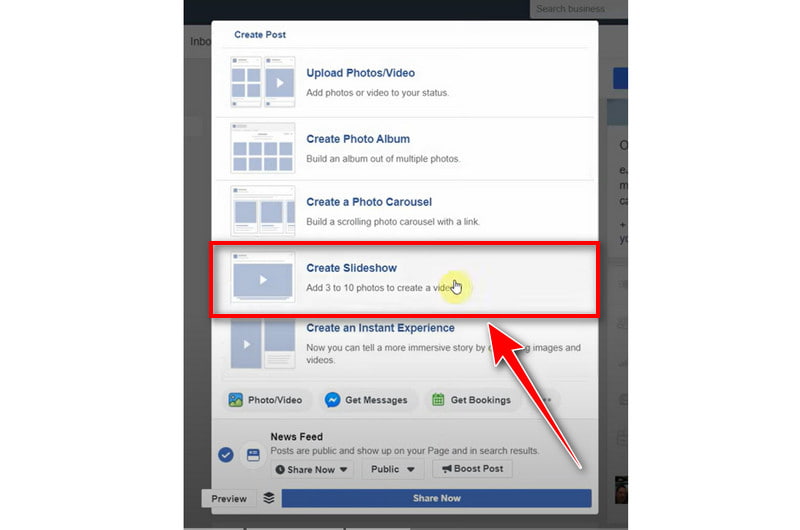
Step 2. Go to your Facebook profile and select Add Photo/Video. Then, choose Create Slideshow from the list of options.
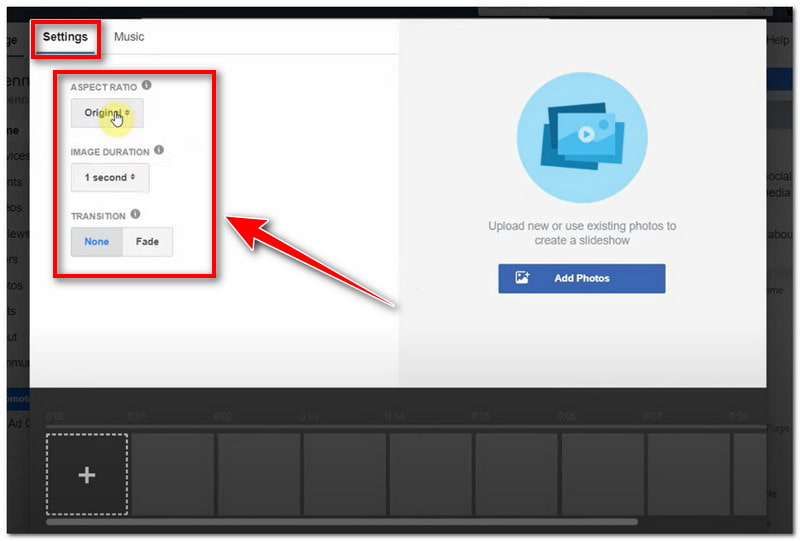
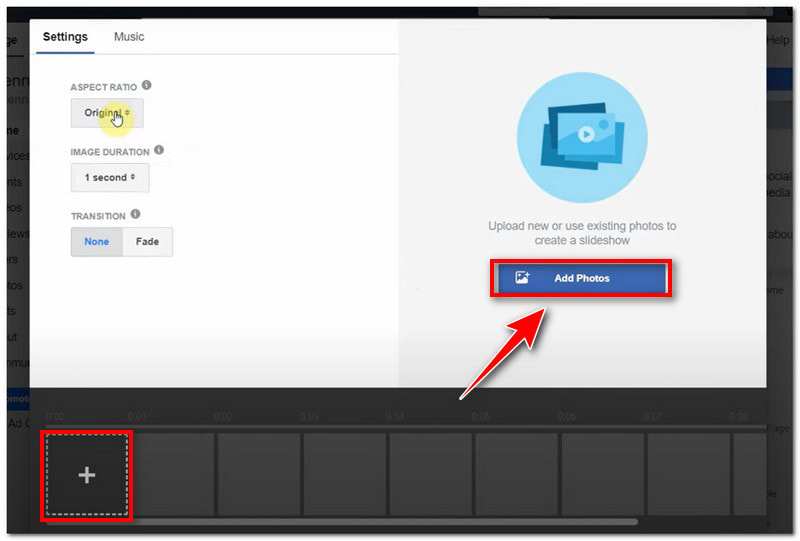
Step 3. You will be redirected to Create a Slideshow. There, you will have an option to adjust the settings of your Slideshow. This includes the following:
- Aspect ratio: If you prefer a square for the ratio of your slideshow, choose 1.1. If you like a rectangle, select a 16.9 ratio, and choose 2.3 if you prefer vertical. Alternatively, let the first image in your slideshow determine the ratio.
- Image Duration: Select the time you want to spend with each slide in the slideshow. You can set the duration of each slide in your Facebook slideshow to 0.5, 1, 2, 3, 4, or 5 seconds. Note: slideshows should not be longer than 15 seconds.
- Transition: You may choose between None or Fade to customize how the slideshow switches from one image to the next.
Step 4. Next, upload all the photos you want to include in your slideshow by clicking the Add Photos button or the plus sign below. This will open your local file. Once it is done, click Open.
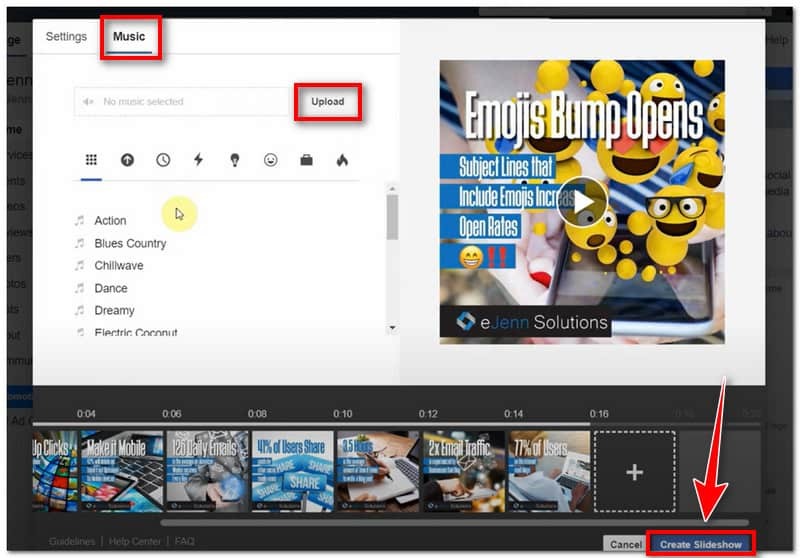
Step 5. Wait for your photos to load. After that, you may also add Music to your slideshow. Some music is available, but you can also upload it from your local file. Once satisfied, click the Create Slideshow button below to publish it on your Facebook.
Part 2. How to Create a Slideshow for Facebook
Use Vidmore Video Converter to Do a Slideshow for Facebook on Desktop
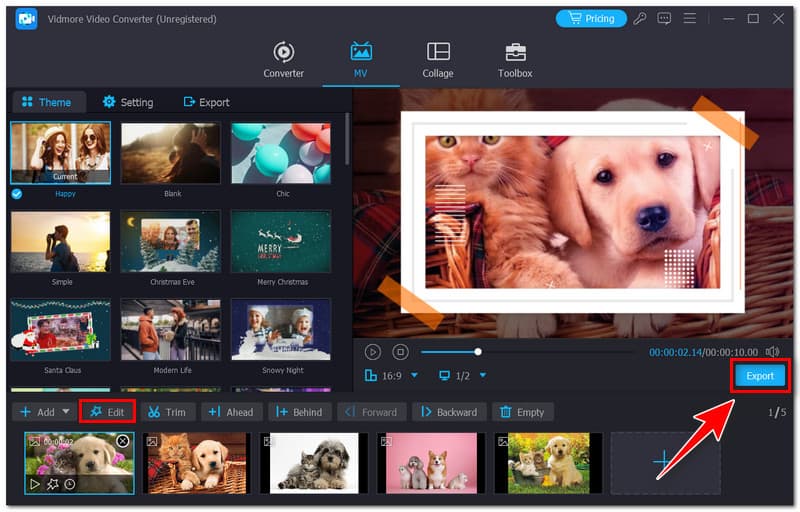
Suppose you are looking for other ways to create a slideshow for Facebook that offers more options and features. Vidmore Video Converter is considered the best option for that. With this feature-rich Facebook slideshow maker, you don’t have to use other software to edit your images and slideshow. It offers dozens of premade templates that you can use to make your slideshow without hassle. What’s more, you can even personalize them according to your liking. You can add music, effects, texts, transitions, and more to customize your picture video to perfection. After burnishing your work, you can save your astonishing creation as MP4, MOV, or any other well-known format. Afterward, you may share it on your favorite sites, such as Facebook. Here are the steps on how you can use this Facebook slideshow maker:
Step 1. First, download and install the comprehensive Vidmore Video Converter on your computer. After that, launch the program.
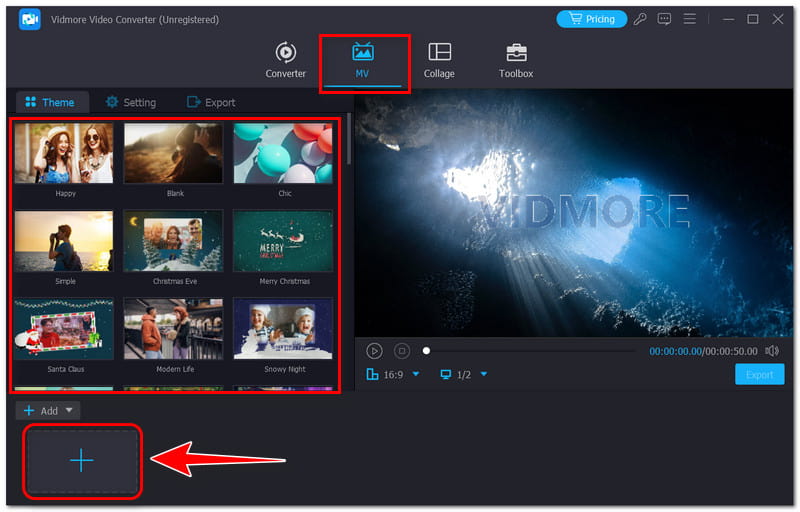
Step 2. Go to the MV tab and select the template you prefer. Next, click the Add button below or the plus indicator to upload all the images you want to include in your slideshow.
Step 3. Wait for the images to load, then tick the Edit button. You can crop, rotate, and add filters and effects, a watermark, a subtitle, and music to your slideshow.
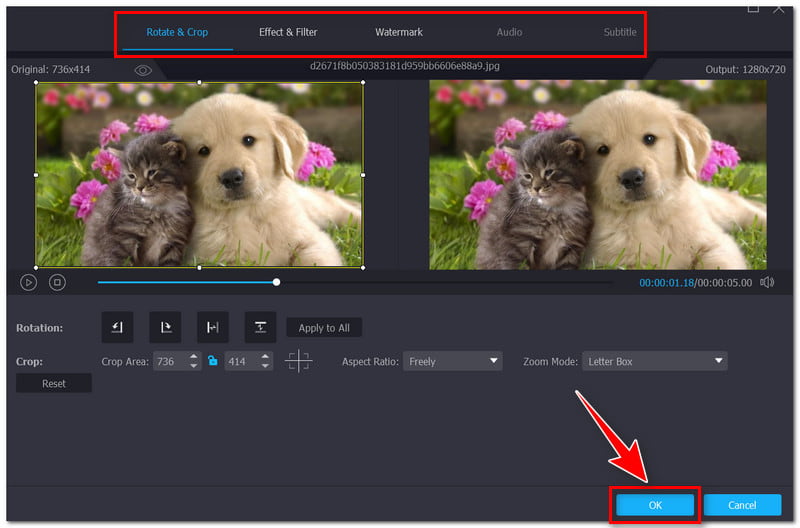
Step 4. Once you've finished, click the OK button. If you're satisfied with the slideshow, click the Export button to save it and upload it to your Facebook account.
On Phone: Make a Slideshow for Facebook Using CapCut
Here is the best option if you seek an alternative to create a slideshow using your portable device. You may use Capcut, a popular application for Android and iPhone users because of its feature-packed options for making astounding slideshows. However, you may access all of its unique features once you purchase a subscription to the tool. Here are the steps you can follow on how to make a slideshow for Facebook on iPhone using this app:
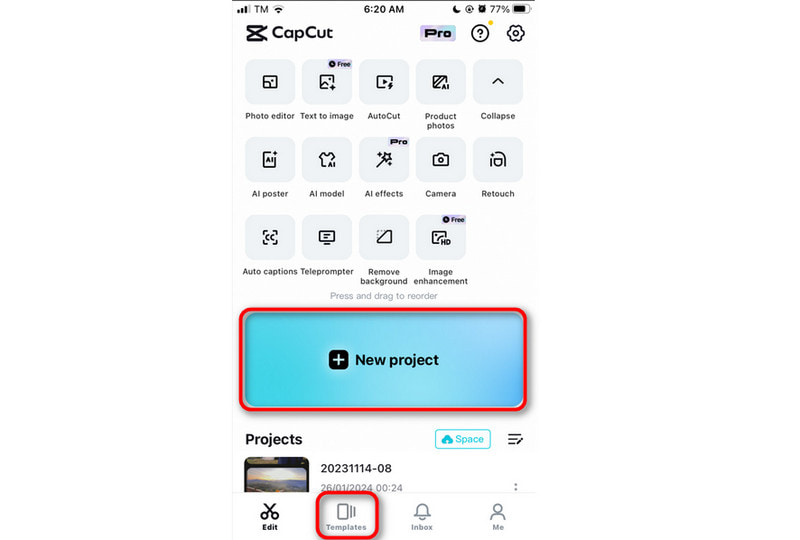
Step 1. Open the CapCut app on your Android or iPhone device. Next, click the New Project tab to add photos, or you may use Templates for your slideshow.
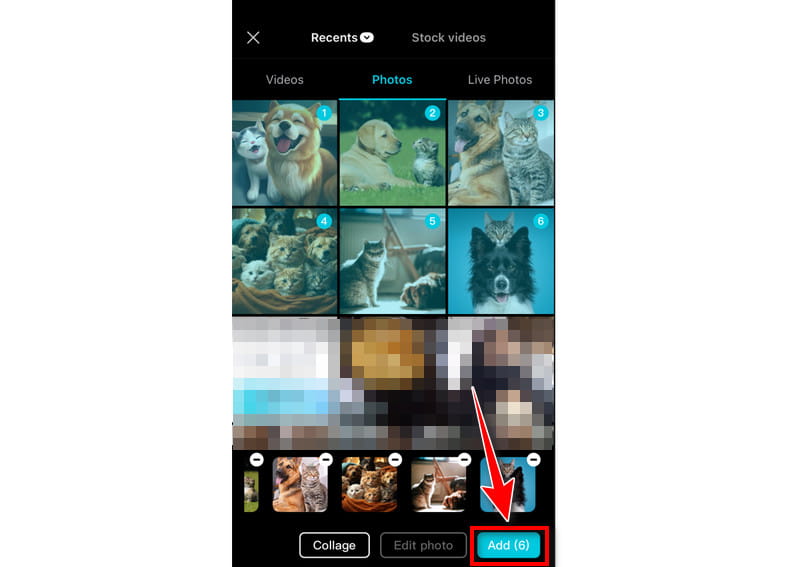
Step 2. Say you click the New Project tab. Select all the photos you wish to add to your slideshow. After that, press the Add button below.
Step 3. Using the app, you may add transitions, effects, trim, and the audio of your choice to the slideshow. Edit it according to your preference.
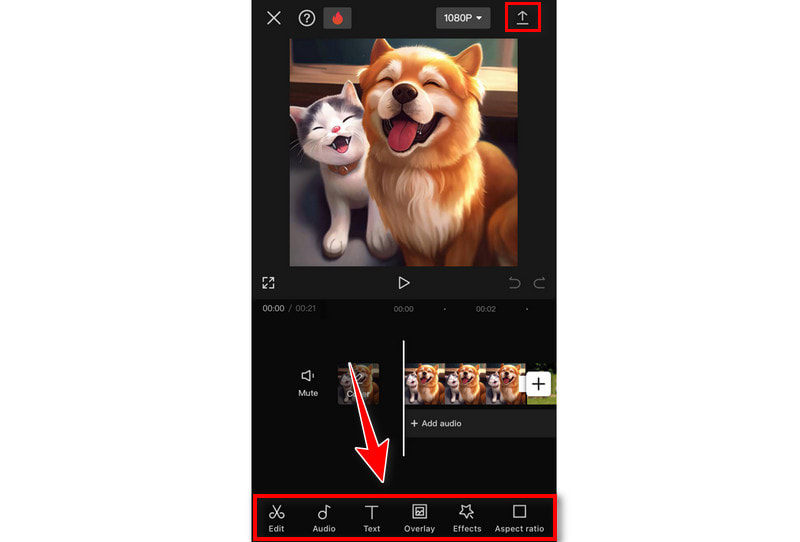
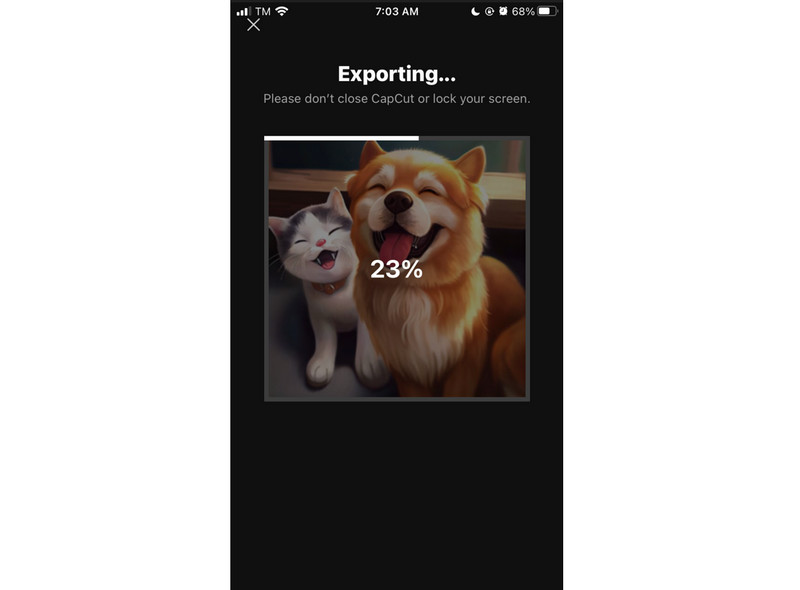
Step 4. Once done, click the Arrow icon in the app's upper-right corner to Export your slideshow. Now, you may post your newly created slideshow on Facebook.
Part 3. How to Post a Slideshow on Facebook
Now that you know all the best ways to make a Facebook slideshow, it’s time for you to share it with the world! Through this, you can also boost the popularity of your Facebook page to gain more followers and friends. So, without further ado, read the steps below and know how to post a slideshow on Facebook in three easy steps:
Step 1. Log in to your Facebook account. On the homepage, select Add Photo/Video to create a post.

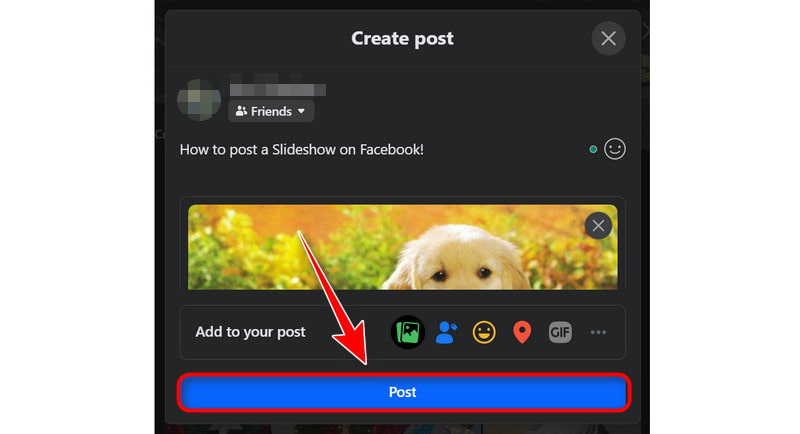
Step 2. Next, select the slideshow you created in your local folder and click Open. Wait for your slideshow to load. Then, add a caption for your post or tag friends before posting.

Step 3. Once done, press the Post button below and wait for your slideshow to upload successfully to your Facebook account.
Part 4. FAQs on How to Make a Slideshow on Facebook
Why can't I create a slideshow on Facebook 2022?
This is because Facebook no longer offers the option to create slideshows directly within the platform. The feature may have been removed or replaced with other functionalities. However, You can still create slideshows using other third-party software like the Vidmore Video Converter and then upload them as videos or photos to your Facebook account.
Can Facebook's cover photo be a slideshow?
In the same manner as adding a new cover photo, you can select a video to use as your Facebook convert photo. If the cover video function is available, you can upload a new video (Upload Photo/Video) or choose one from your library (Choose from Videos).
Can I upload a slideshow with music to Facebook?
Absolutely, yes. You can upload a slideshow with music to Facebook by creating a video slideshow using video editing software or online tools and then uploading the video to Facebook.
Conclusion
Now, it's your turn to make a slideshow on Facebook. If Facebook does not have a slideshow option, you may still create a photo slideshow using Vidmore Video Converter, the most excellent Facebook slideshow maker. With its robust video editing features, you can count on it to produce the best slideshow for Facebook. So, don’t waste your time now and apply what you learn on how to create a slideshow for Facebook.
