How to Make a Movie from Photos
Typically, people will compile pictures and turn them into a slideshow to project a still photos presentation. It is a great alternative to present the images. Also, some create montages to make a series of films and assemble them as one. But thanks to the technology we have today, it is now possible to make a movie with pictures itself. Seems impossible? Well, not really, since programs can apply effects, filters, and proper transition to create a film. So, if you're wondering how to do that, we scoured and compiled the best ways to produce a movie using pictures for computers and smartphones.


Part 1. Professional Way to Make a Movie with Pictures, Videos and Music
If you are looking for a simple and easy to use image to movie maker video software, Vidmore Video Converter is one of the best options. It is not only a video format converter but also a video editor and movie maker. Its MV feature works great as a short movie creator, while you can also make photo collages in it.
Step 1: Download and Install the Movie Maker
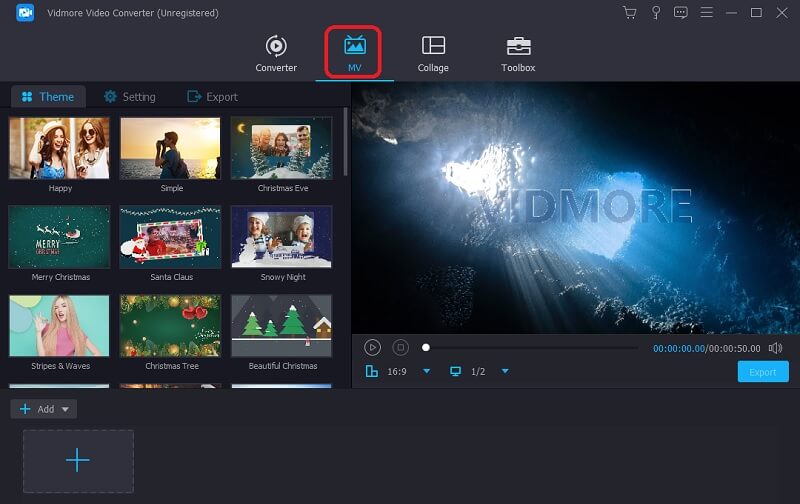
Download and install Vidmore Video Converter. The free trial has plenty of features, but you may also opt for the paid version for long-term use. Open the program and go to the MV tab. Then, select a suitable theme from the built-in options.
Step 2: Upload the Images
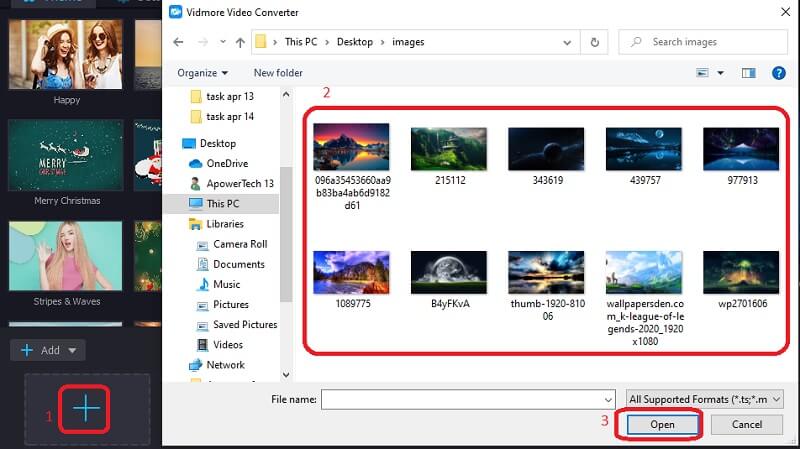
Next, click the Add icon and select the image files you want to include in the movie. You can also add whole folders from here if there are large quantities of images.
Step 3: Adjust Image Time Slots
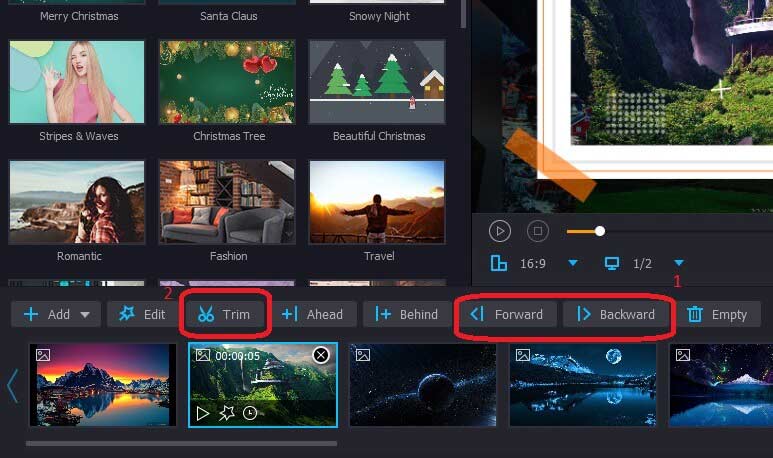
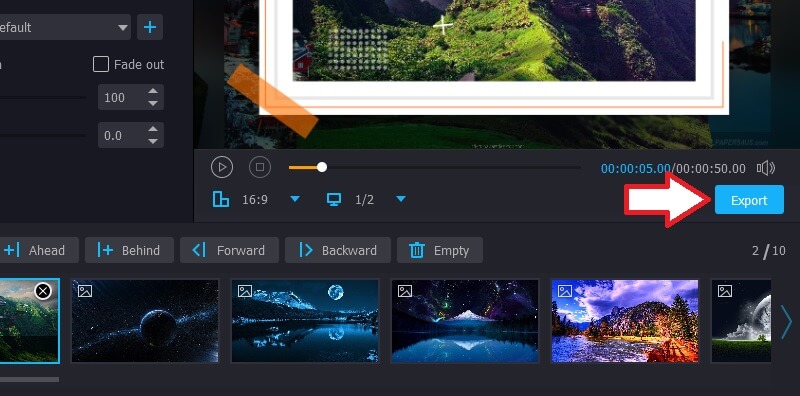
By default, each picture will be displayed for 5 seconds, but you can use the Trim button to adjust the time slot for each image. You can also change the sequence in which the images are displayed. Select a photo and use the Forward and Backward buttons to display it earlier or later, respectively.
Step 4: Apply Effects
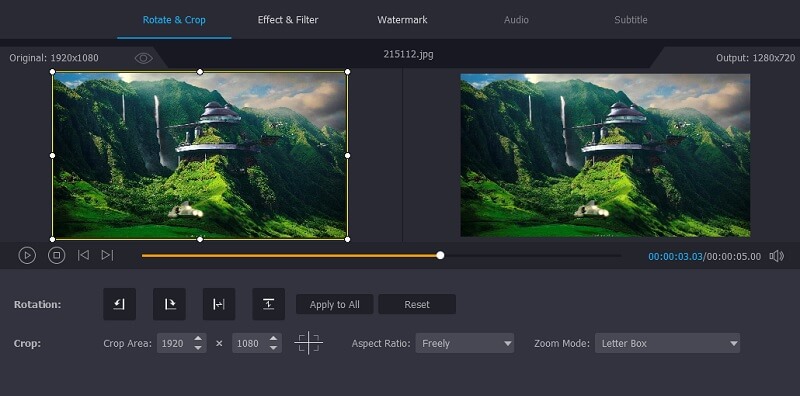
The video and picture movie maker also has several effects and filters to enhance your pictures. Click the Edit button and go to the Effects & Filters tab on the top. You can also adjust your images' size and orientation from the Edit window using the Rotate & Crop tab.
Step 5: Add Background Music
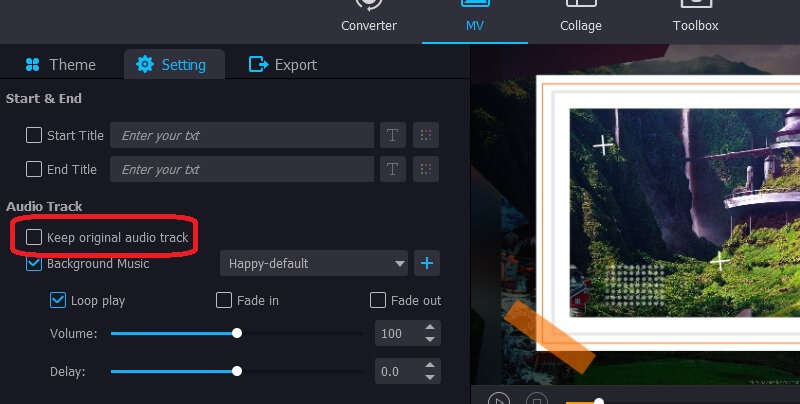
You can also add your music instead of using the one that comes with the theme. Simply click the Settings button and uncheck the Keep original audio track checkbox. Then add the audio file of your choice if you want to. Here you can add the opening and closing note/title as well.
Step 6: Create a Movie with Photos and Videos
When you are done with the editing, click on the Export button in the photo and movie maker to save your video. Here you will find options to select the file format, frame rate, and video resolution according to your requirements.
Part 2. How to Make a Movie in Google Photos
Google Photos started as a simple smartphone app that displayed the pictures stored on your device and stored them in your online storage space in Google Drive. Now it has added many features, including the option to make movies with photos and music online. The tool is widely accessible across all platforms, including Windows, Android, and iOS. In case you're wondering how to make a movie with photos on iPhone, or any other platform for that matter, here is how:
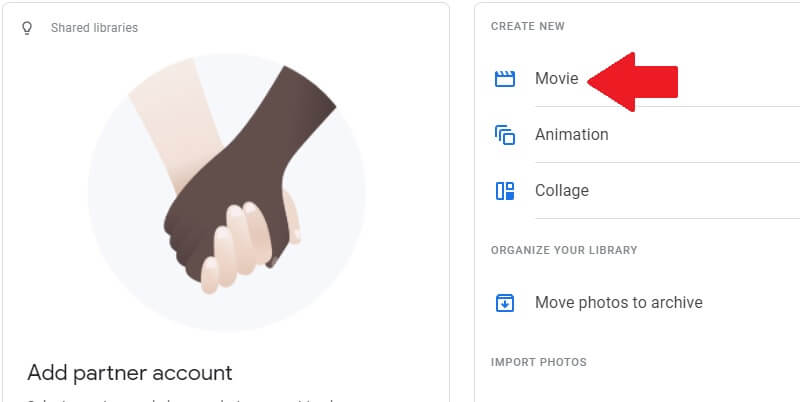
- Open Google Photos and go to the Movies album at the top. Then, click the Create Movie button on the next screen.
- Pick a suitable theme from the options available or start from a blank canvas. The themes also have music added to them, but you can always use your choice's audio.
- If you choose to go with a theme, select the star of the show and click Done. Otherwise, just choose the photos you want to include and press Create.
- Google photos can also go through all the images on your device and assemble the ones with the same person or thing you selected the picture of.
- To edit the movie, press the Settings button. Here you will have the option to:
• Add more videos and photos. You can include up to 50 items.
• Insert, duplicate, or remove clips from the movie. You can do this by tapping the three dots button on the right-hand side.
• Change the sequence of the clips. To do this, press and hold the clip you want to change the position off and move it to your desired point.
• Move the slider to shorten or lengthen the video clip. - When you are done with all the editing, press Save at the top of the screen. So now you know how to make a movie in Google Photos. Let your imagination run wild.
Part 3. The Other 3 Image to Movie Makers for Occasional Use
A lot of people don’t know how to make a movie from photos. Professional movie producers have their high-end software and equipment to work with all day. But most of us are just looking for how to make a short film with photos and music for the occasional use like birthday celebrations, farewells, and other events.
1. Image to Video
Image to Video has various features that allow you to make a movie with video clips and pictures. It has options to trim videos and add 3D transitions between the photographs as well. However, there is a limit of 30 photos for use in a single video. The website is simple to use. You just have to open the website, upload the image files you want to use, and rearrange them. Not just this, you can also add audio files of your choice, company logos, and text to the video. Before saving the changes, you can preview the video to make sure it is up to the mark.

2. Kapwing
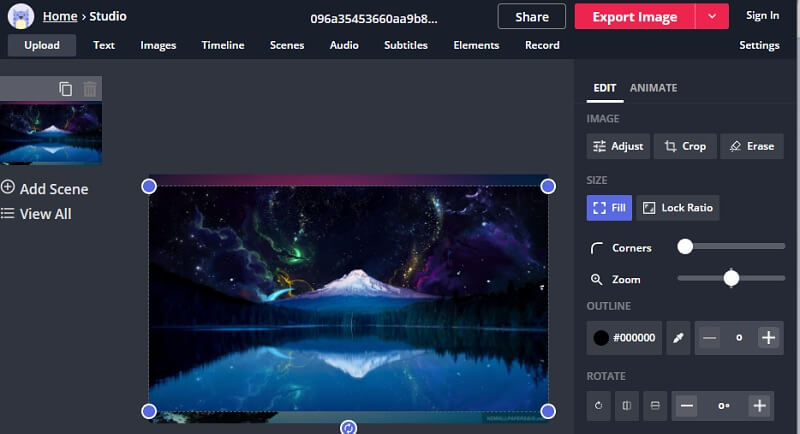
Kapwing is an online video editing service with some essential tools like resizing images, trimming videos, and adding text. Although not a very advanced platform, Kapwing is excellent for quick edits to convert pictures to videos and change the aspect ratio to fit your criteria.
3. Picovico
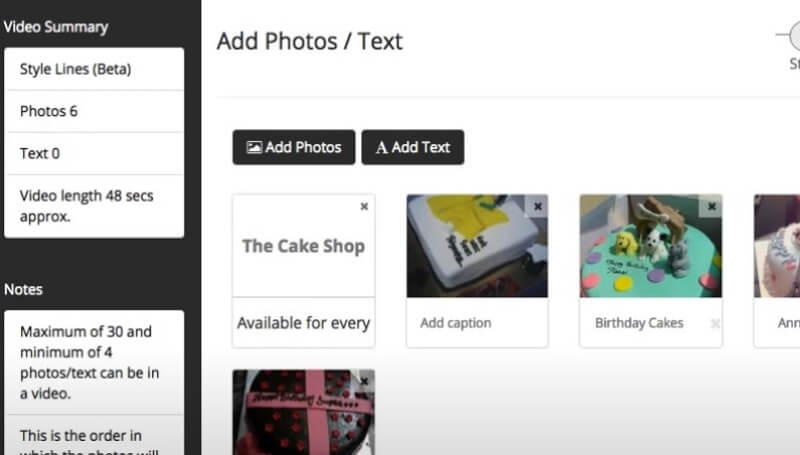
Picovico is an online video editing platform tuned towards making birthday celebration videos using photos. To use the tool, you have to create an account and sign in. The free version has quite limited features; for example, the duration and quality are restricted. So, if you want high-quality, long-length videos for your son’s birthday celebrations, consider purchasing the Birthday Bash subscription plan. The plan also comes with several songs suited to the event, so you don’t have to search the internet.
Part 4. FAQs of Making a Movie with Vidmore Video Converter
1. How to combine several video files into one?
To combine multiple videos, you can try the merging feature provided by Vidmore Video Converter. After you add all video clips and adjust them to the correct order, you need to select the Merge into one file option next to the Convert button.
2. How to add a logo to the video?
Go to the Edit window and open the Watermark tab. Here you can add your company or brand logo to the video.
3. How to divide a lengthy video into smaller clips?
Press the Trim button above the section where the images and videos appear. A new window will open where you can cut out clips from your video to be saved separately.
4. How to increase the volume of the audio in the final video?
Go to the Settings section. Here you will find the Volume slider. You can adjust it to up to 200% of the original audio volume to make your video’s audio louder.
5. How to remove the black border around the video?
Choose the resolution that perfectly fits your output file requirements. Then open the Edit window and click on the Crop button. You can also use the mouse to adjust the crop area on the photo.
Conclusion
At this point, you should know all the different ways on how to make a movie from photos. You can try the way that suits you best to create a video with pictures and songs.
