How to Add Tags on a File on Mac and Windows
Digital management rights encompass many aspects, including tag embedding. Tag embedding is one of the techniques and measures used for access control and illegal reproduction of online information or intellectual property. That said, you want to learn how to add tags to a file to prevent unauthorized users from illegally duplicating or producing copies of your files.
But how do you do it? You may accomplish this task using a tag editor or a default method. Therefore, if you are compelled to add tags to your files, check out the list of tag embedders we sorted below.

PAGE CONTENT
Part 1. How to Add Tags to a File on Windows and Mac
There are times when it is way more fulfilling to use third-party programs as they give you useful features than the traditional or default tools. With that said, we researched effective files to add tags to a file.
1. Vidmore Video Converter
An ultimate and convenient yet simple way to add tags to a file is using Vidmore Video Converter. This program contains essential and awe-dropping tools, including the metadata editor. Using this tool, you can edit the tags of your media file with the latest version of metadata tags for more detailed tag editing. Aside from adding, it can also remove tags from your file. Meanwhile, if you wish to update the tags, the tool lets you quickly edit the metadata tags.
The best part is it comes with beneficial tools other than metadata adding and editing. Converting images, editing video and audio files is possible with the help of this tool. On top of that, it is easy to navigate. Even non-tech-savvy people can use the program without any complications at all. If you wish to learn how to add tags to a file without opening it, follow the instructional guide beneath.
Step 1. Download and install Vidmore Video Converter
Before anything else, download the program on your computer. Just tick any of the Free Download buttons given below. Once done, follow the setup wizard to install the program correctly. Then, launch the program to see its working interface.
Step 2. Access the metadata editor
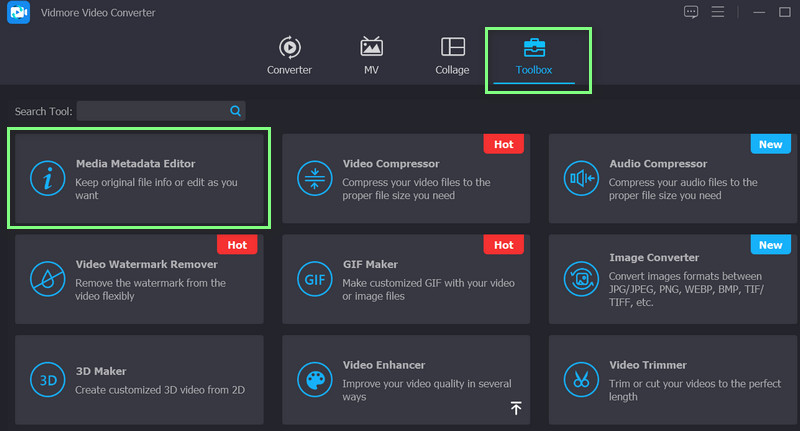
Notice that there are four tabs in the upper interface of the tool. Go to the Toolbox tab to see a collection of programs you may use depending on your needs. The metadata editor is also situated here. Now, choose the Media Metadata Editor. Then, a dialog box will appear.
Step 3. Import a media file
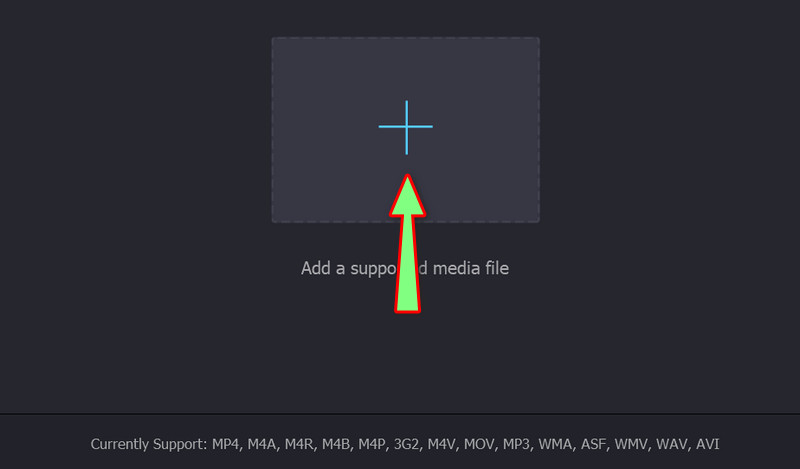
From the appearing window, you will see the add sign. Click the add sign button to open your computer file explorer. Now, locate and import your target media file. The program will open another window.
Step 4. Add tags for the file
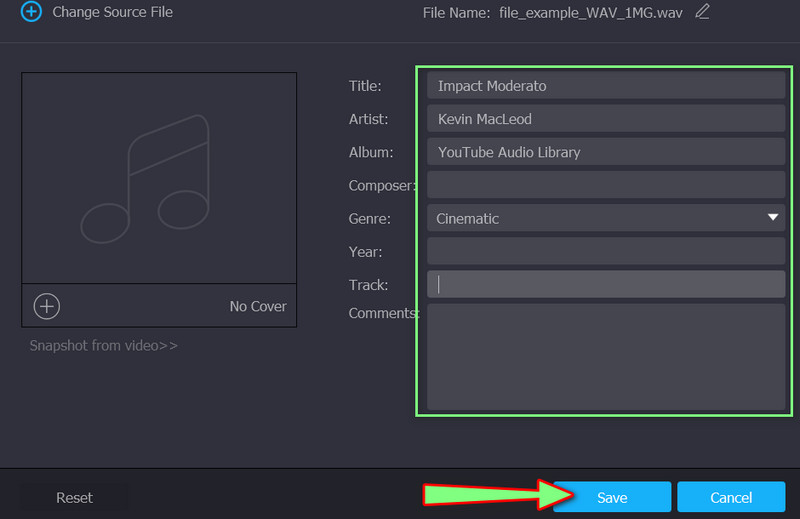
Notice the tags on the tags you can edit here. To input the information for the tags, simply tick on the text box field associated with each tag category. Then, type in the necessary information tag and hit the Save button to confirm the changes.
2. Microsoft Office - Word
Apparently, Microsoft Word is used for processing text or documentation. The thing is, it has some bells and whistles under the hood. One great function is adding tags. In fact, it features different ways to add tags to a file. Today, we will look at one of the methods on how to add tags to a file using the Word app.
Step 1. Download and install Microsoft Word on your PC. After that, launch it.
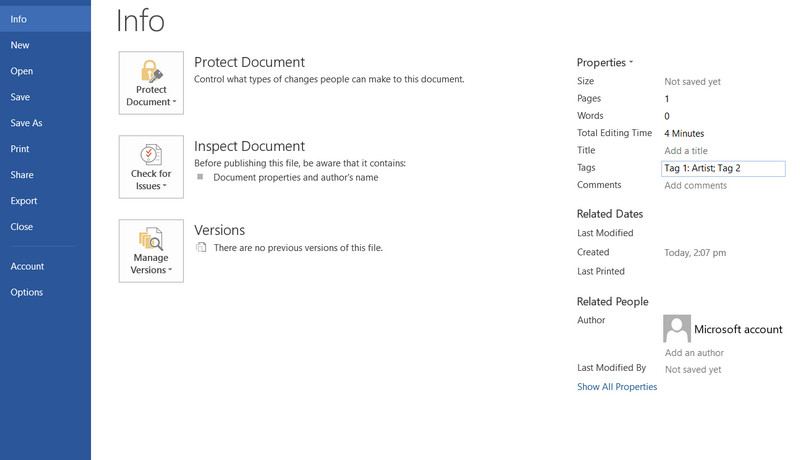
Step 2. in the ribbon, click the File tab. Next, In the Backstage view, click the Info tab. By default, you will be in the Info tab.
Step 3. At this point, you will add your tags to the file. Hit the Add a tag on the right portion of the interface.
Step 4. Next, type in the information to add tags. You may add multiple tags, but remember to separate them with semicolons. Otherwise, Windows will read them as one tag.
Part 2. How to Add Tags to a File Without a Third-Party Tool
As we know, downloading programs is not everyone’s cup of tea. Using the default tools or methods is more beneficial, especially if you are saving storage space on your computer. It is also less hassle since you do not have to learn another method that could be strange for you. Anyway, here is a clever way how to add tags to a file on Windows 11 without using a third-party tool.
The Properties menu is strangely useful for adding tags to your files. It is a feature of any Windows operating system. With it, you can access the information or tags with respect to your media file. You can add information for categories like producers, writers, publishers, and media info, like the year, genre, and many more. Follow the guide on how to use this tool.
Step 1. On your Windows 11, locate the file you wish to add tags to.
Step 2. Right-click on the selected file and select Properties from the menu.

Step 3. Next, go to the Details tab, and you will find tags and information you can add to the file.
Step 4. Now, tick on their text fields and add text or tags according to their proper categories. Once done, hit the OK button to save the changes.

Part 3. FAQs about Adding Tags on a File
How can I search for tags in File Explorer?
Using your Windows device, you can search for the tags using the search bar field. Simply type the tag into the field, followed by the name of the tag, and hit enter. Then, you should see the results of files with the tags you specified.
How can I edit tags online?
There are tag editors online you may use. Some examples include TagMP3.net and MP3Repair. In this way, you can directly add and edit tags without having to download an app.
How to delete tags of the file?
The methods featured in this post can help you remove or delete tags. You can use the proposed application or the default method on Windows computers.
Conclusion
Suppose you are still pondering how to add tags to a file. The solutions are already presented to you. All you got to do is take action. You will not get the result unless you take the first step, which is trying these programs. Meanwhile, you have two options. The first method is the use of applications. The latter method is by using the default way. The only downside of it is you can only accomplish it if you are using a Windows system.

