How to Crop & Resize a Video in Premiere Premiere Pro in 2025: Easy Steps
We cannot deny that videos are engaging and appealing. However, if you want to eliminate an insignificant area, you can do that by cropping the video. But how can we do that? With the help of this How-To article, we will have an idea of how to crop video in Adobe Premiere, and we will also suggest another software for easier use. You can start reading now!

PAGE CONTENT
Part 1: How to Crop Video in Premiere
Do you think it is necessary to crop videos? Well, it depends upon the situation. For example, you are cropping a video because of the excess area you do not want to see while playing the video. On the other hand, you are resizing the video because you want to upload it to various social media sites.
Furthermore, this How-To article is about how to crop video in Premiere and how you can change the aspect ratio in Premiere. But what is Premiere all about? It is part of Adobe, and it is mainly called Adobe Premiere. It is also a leading video editor on the Internet with professional tools and features. For that reason, it will help you make or create a fantastic video.
Now, if you are reading this article to learn how to change aspect ratio or crop video in Premiere Pro, it is your time to do it. Below, we will provide you with two methods. Please see them and read the steps carefully.
Method 1: How to Crop Videos in Premiere Using the Crop Feature
One of the essential parts of editing a video is cropping it. In order to crop videos and make them aesthetic, we will use Adobe Premiere Pro crop video, and this is one of the two methods we mentioned a while ago in the upper part. Please see the steps below:
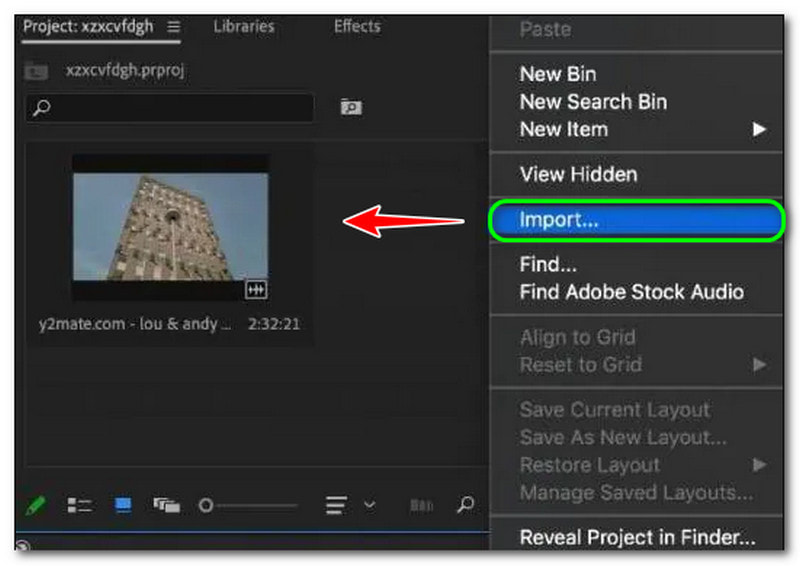
Step 1: Once you launch Premiere Pro, click the Go to Files button. Then you will see the Import Files and select the Import button on the List Options to successfully add your video to the Project Panel.
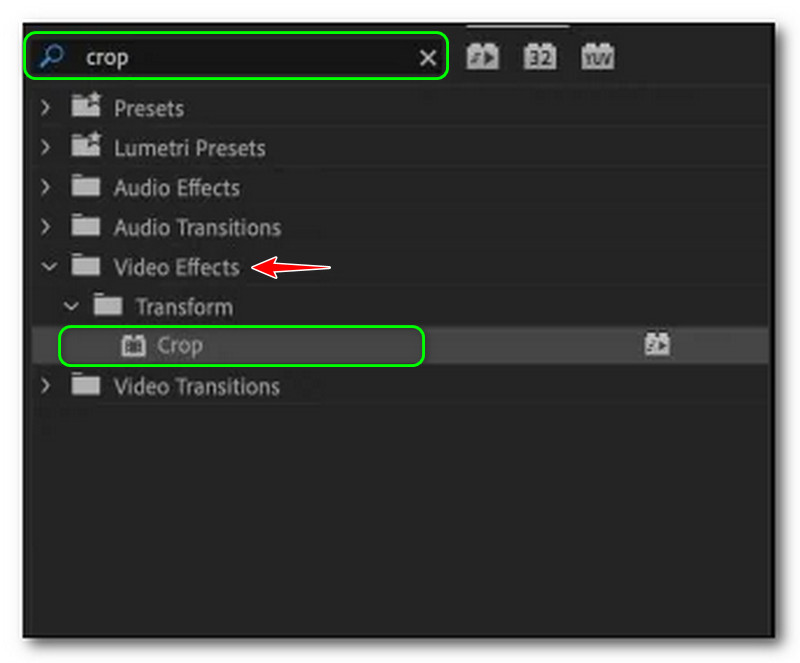
Step 2: On the top panel, select the Effects Panel. The Effect Panel contains Presets, Audio Effects, Video Effects, etc. Choose Video Effects, and you will see the Crop button tap that. Or, search it on the Search Bar on the top corner of the panel.
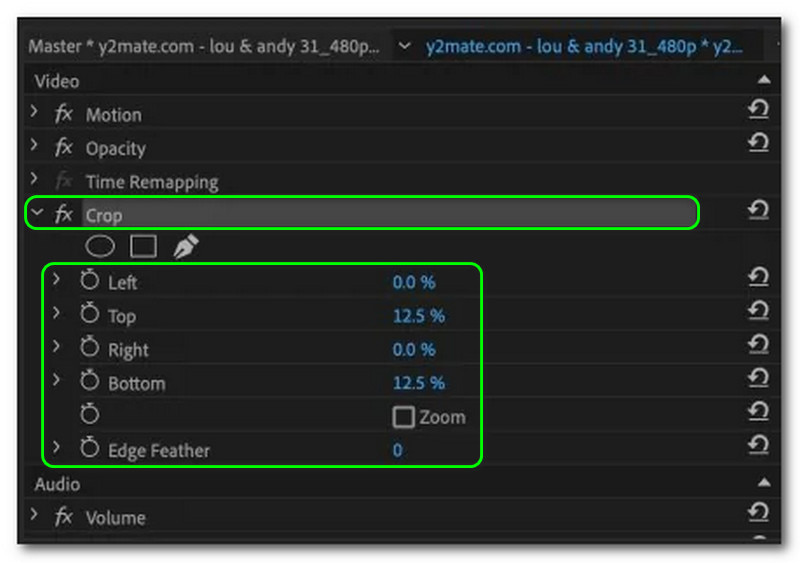
Step 3: You need to double-click the Crop effects and add them to your clip. After that, the Effects Control Panel will process the Crop Effects on your left sides of the screen, such as Left, Top, Right, Bottom, and Edge Feather.
Step 4: Click the player head on the video you want to crop. After that, tap the video and select the Crop Effect to enable the rectangular handle. In addition, the Preview of Premiere will show you the rectangular handle, which you can adjust and crop the video to your liking.
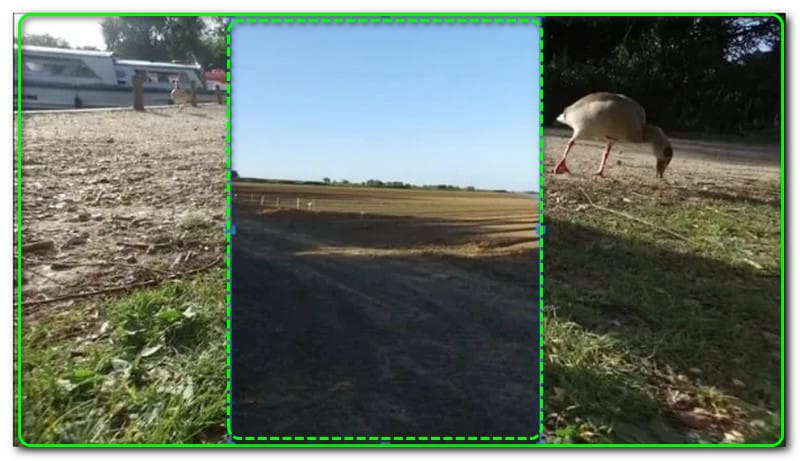
After you crop the video, you can save it to your PC. Furthermore, the disadvantage while using Premiere is it is not manageable to use. Therefore, if you are not a professional user, you will not enjoy using Premiere Pro to resize or crop videos.
Method 2: How to Crop Video in Premiere using the Frame Size Feature
It is the last method on how to crop a video on Premiere Pro 2022. Above, we shared the steps using the Crop Feature, and in this part, we will show different methods using the Frame Size Feature. Please see the steps below and use them as a guide to crop your video.
Step 1: Add your video to the Project Panel in the cropping feature of Premiere. You can add two or more videos to crop them simultaneously. After that, you will see your video in the right side corner.
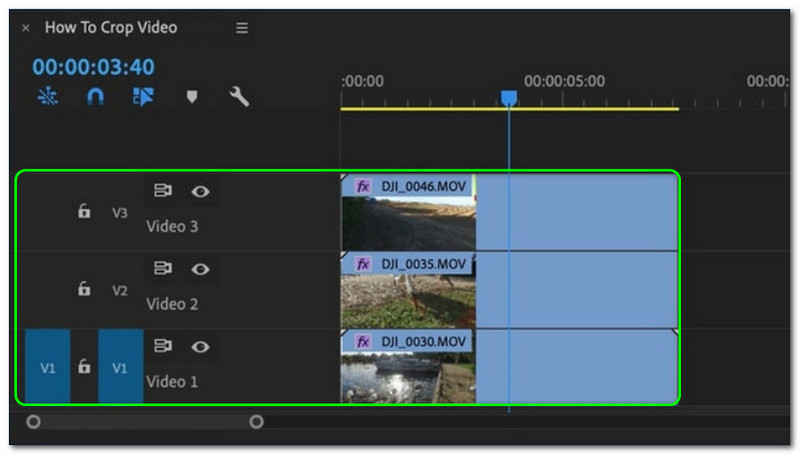
Step 2: After that, you will proceed to crop the video using the frame size feature. Once you click the video, all the options will appear on the left and bottom corners of the screen. Then, select the Crop button.
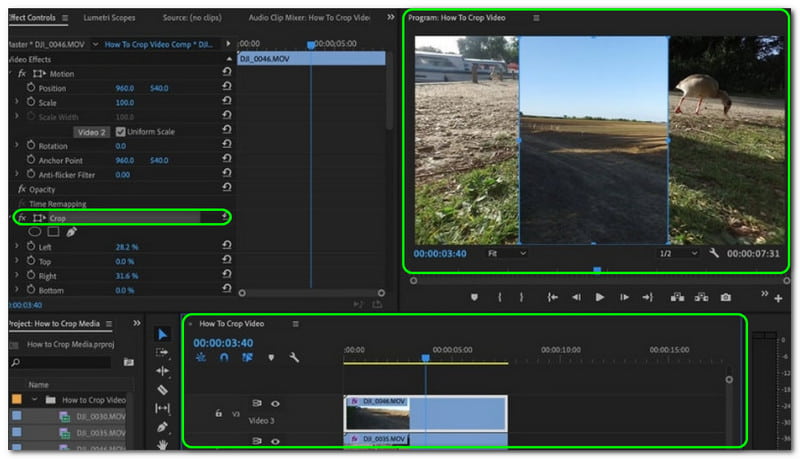
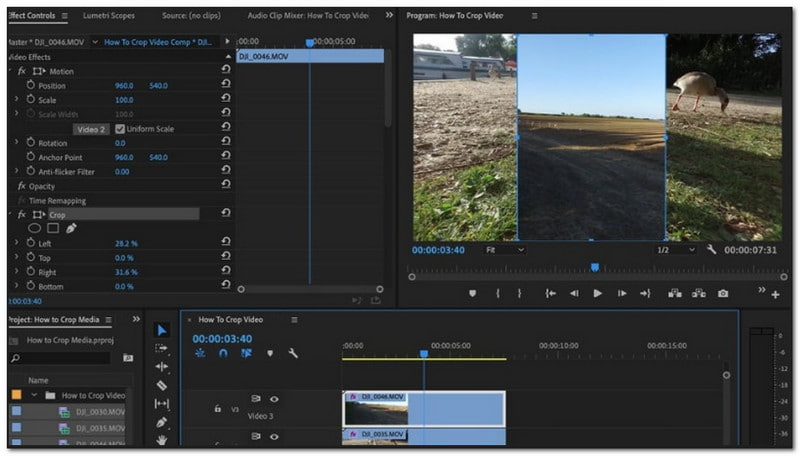
Step 3: Lastly, crop the video until you end up with the desired size. Take note; once you leave a space between your videos, it will immediately display as color black. After that, you can start saving the cropped video on your computer.
Finally, we are done sharing with you Method 1 and Method 2 using Premiere. Yes, we can conclude that Adobe Premiere Pro is not advisable to use, especially if you are a beginner user. In addition, since it offers many tools, it is confusing. However, it is for professional use. Therefore, there are a lot of users who will appreciate Premiere.
For using other video cropper editors, just keep reading.
Part 2: Easier Way to Crop Video With Premiere Alternative
There are many reasons why it is necessary to crop your video. As we said a while ago, you are cropping a video if you upload it to social media sites or more. Moreover, in the upper part of this How-To article, we witness how to resize a video in Premiere unmanageable.
For that reason, in this part, we will use an easier-to-use software that will make the cropping video process easy and fast at the same time. We are introducing Vidmore Video Converter. It offers numerous features, especially in video cropping.
It lets you adjust the crop area by typing the desired size. Or, freely choose with the available Aspect Ratio, such as 16:9, 4:3, 21:9, 9:16, etc. In addition, Vidmore Video Converter has high-quality video processing for 4K/5K/8K videos and enhances video quality by AI. That means after the cropping process, the quality will be maintained. Here are other main features in a bullet form:
- It supports over 300 formats for video, and audio for cropping, converting, and more.
- Its GPU acceleration can speed up the video process at 60X faster.
- It offers over 30 editing tools like video cropper, video trimmer, watermark remover, subtitle editor, and more.
- Its collage features let you make a video quickly with photos, videos, and audio.
- Create multiple-screen videos to watch over 16 scenes at one time from 1 screen.
Now we will teach you to modify the aspect ratio of a video using Vidmore Video Converter. Please see the steps below and follow them easily.
Step 1: After downloading the Vidmore Video Converter, open it, and you will see its main interface. You will see the four options above; Converter, MV, Collage, and Toolbox.
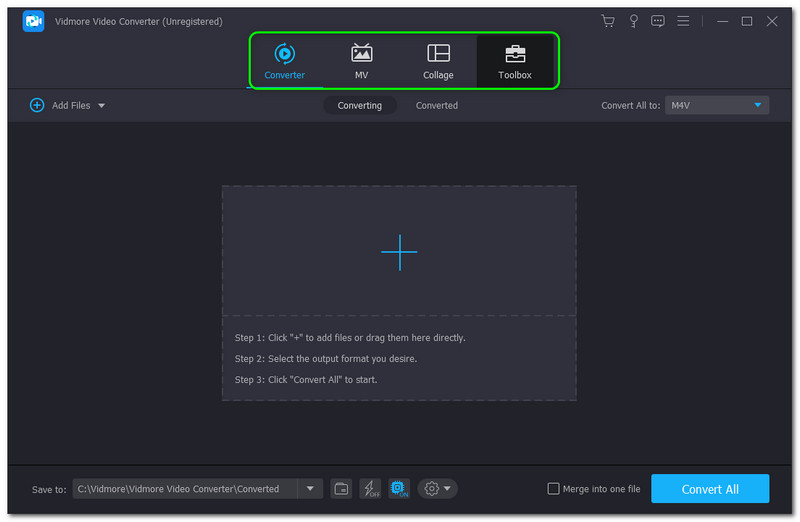
Step 2: Select the Toolbox and find the Video Cropper in the middle part of the Toolbox panel. Then, launch the Video Cropper panel.

Step 3: Then, you will proceed to the panel of Video Cropper. Upon clicking the Plus Sign, you add the video you want to crop. After that, you will see the Preview and the Options below the panel. You can adjust the Crop Area or change the Aspect Ratio.
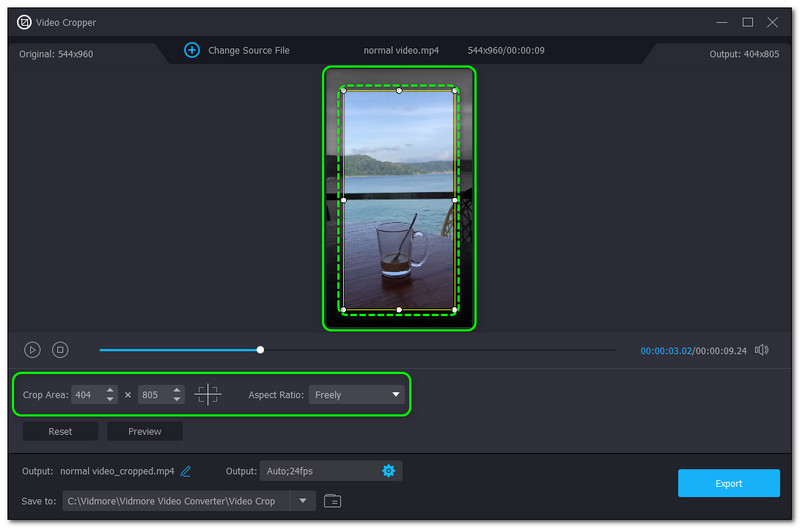
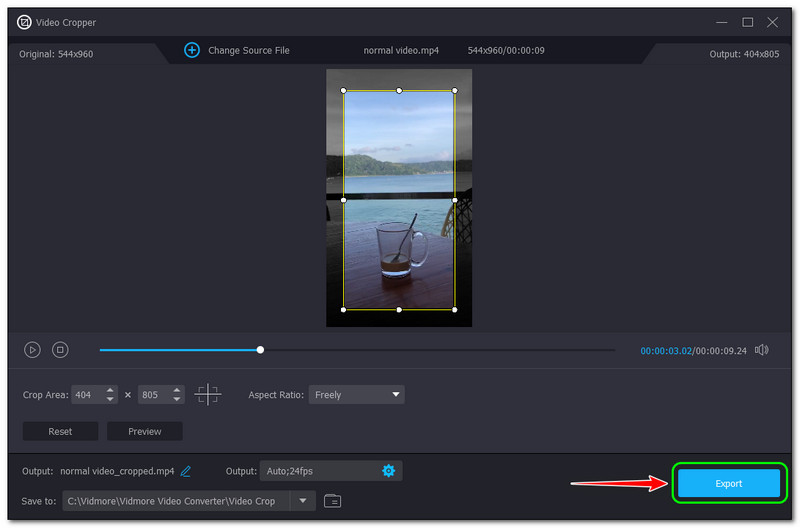
Step 4: Lastly, click the Export button on the lower-right corner of the Video Cropper panel. Then, it will automatically save to your computer.
It is much easier and faster, right? That is why we recommend the Vidmore Video Converter. Not just with the Video Cropper feature but with a lot more, especially its main features. To be specific, it has a Video Converter that can convert video and audio to numerous file formats because it is supported with 200+ formats. If you want to know the unique features of Vidmore Video Converter, feel free to try it now!
Part 3: FAQs
What is the Premiere Pro zoom-in on Video?
It is when you want to Zoom In your video and emphasize it. To zoom in, you need to select a segment on your video that you want to zoom in on. After that, you can use your keyboard shortcuts, or you can also use the mouse to zoom in and zoom out your video.
How to change the aspect ratio of the video in Premiere Pro?
You can modify the video aspect ratio in Premiere Pro by changing the Sequence Settings. Go to the Sequence at the panel's top, then tap Sequence Settings. Then, another window will appear. In the Video tab, you can start setting the desired Frame Size. After that, Premier Pro will immediately adjust the aspect ratio.
Is there a difference between cropping video and trimming video?
Conclusion
We have in this How-To article that Premiere is not manageable to use. In addition, it is not advisable for amateurs. Luckily, there is software that is faster and easier to use, the Vidmore Video Converter. You can try it now! Furthermore, if you want more topics like this, we will see you again on our next upload!


