What is Stable Diffusion: Honest Review of The AI Image Maker
Do you have an idea what Stable Diffusion is? Well, it is among the image generators you can operate on your computer. It has various functions to use that can help you get your preferred output after the process. Aside from that, it offers various basic editing functions that can help you enhance your images. If you are among the users who want to explore more about this AI image creator, you can check this review. This post contains complete details you can obtain about the tool. It includes the ways to generate images, how to install the tool, how to train it, and more. So, if you are interested in learning more, grab the chance to take part in this blog.

PAGE CONTENT
Part 1. What is Stable Diffusion
Stable Diffusion AI generator is among the best deep-learning models for generating images. It is even capable of providing high-quality images that can lead to a great viewing experience. This tool can convert the text depicting the visual you would like to produce into an excellent artwork through the Stable Diffusion model. Plus, it has more capability than you can imagine. It can help you save settings, see the history, use negative prompts, and more. So, if you want to generate images from text, you can try accessing this software. So, if you want enough insight into the tool’s function, you can take a peek below.
• Text-to-Image: This is the core feature of the tool. Using various text prompts, you can generate images easily. Plus, the good thing here is that you can get a high-quality image after the process.
• Negative Prompt: Besides generating images, the tool can also offer the Negative prompt function. This function is perfect, especially if you want to remove any subject from the images, like removing the background from an image. Also, before the generation process, you can already use this function to insert all the elements you don’t want into your images.
• View History: You can also rely on this tool to see the prompt history. It is perfect if you want to go back to the prompt you used before when operating the tool. All you need to do is insert the images you have generated, and the tool will insert the prompt.
• Multiple Results: After the image-generation process, the tool can give you multiple results so that you can select your preferred output after the procedure.
Part 2. How Does Stable Diffusion Work
The Stable Diffusion artificial intelligence (AI) model utilizes natural language understanding technology to analyze text description inputs. After inserting the prompt, the tool will begin analyzing the input parameters with the help of trained data and neural networks. It is used to create unique and new visual inputs. After entering the visual input into the tool, it will employ a diffusion model and will provide blurry images. After that, starting from those blurry photos and the neural networks, it will generate new images that are clearer and sharper. Also, it ensures that the generated images are accurate to the provided text prompts.
Part 3. How to Use Stable Diffusion
How to Install Stable Diffusion
Honestly, installing the tool takes a lot of time. It requires you to download various presets to get the software successfully. So, if you want to install the tool, you can check the method below and learn how to install Stable Diffusion.
Step 1. The first thing you need to do is download Git on your computer. It is one of the prerequisites for installing the tool. Go to your browser, look for the Git downloader, and install it.

Step 2. Another preset you must download is Python. After downloading, install it on your computer. Ensure that the prerequisite is updated.
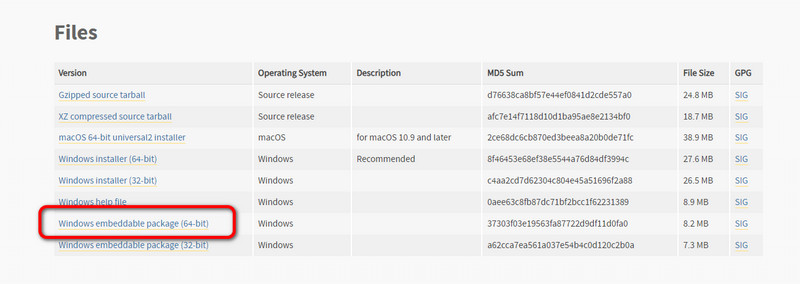
Step 3. The installation process of Stable Diffusion also requires a Model/Checkpoint. You must download the model from the browser.
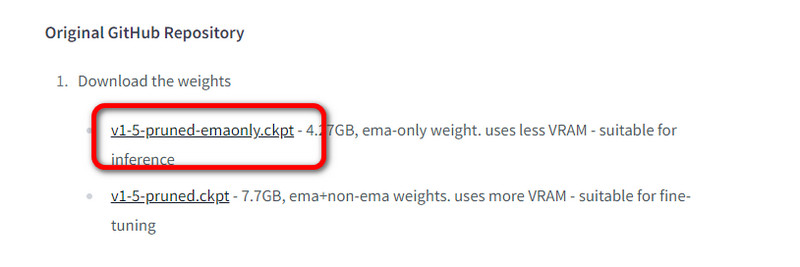
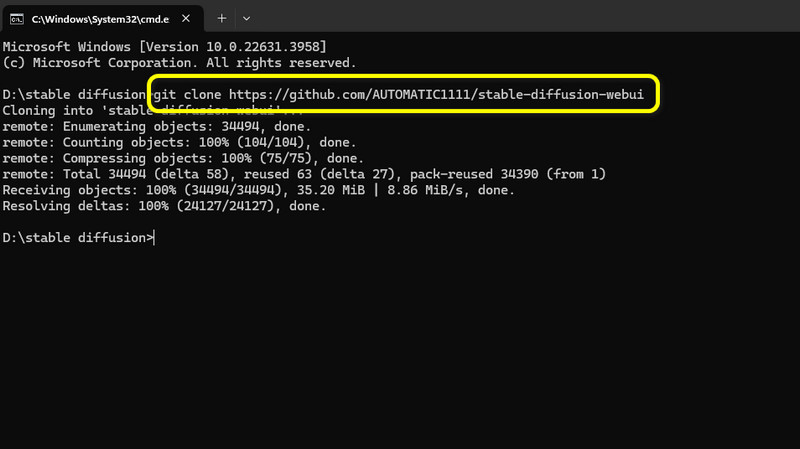
Step 4. Then, create a folder for Stable Diffusion in your File Folder. Go to the Address Tab and type CMD. From the CMD interface, type Git Clone with the provided link from Git and press Enter. After that, you will notice that your created folder will get various files.
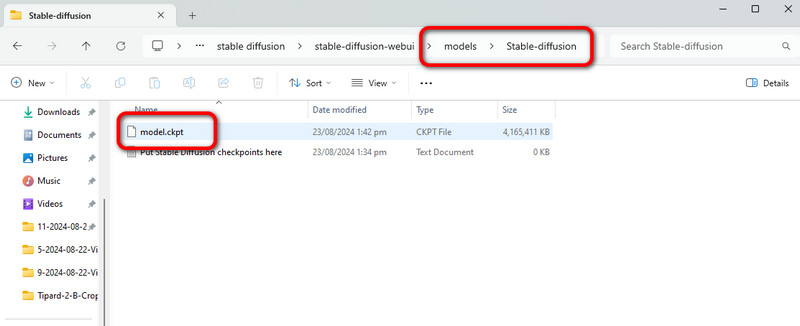
Step 5. Cut the Model you downloaded and insert it into the Model > Stable Diffusion folder.
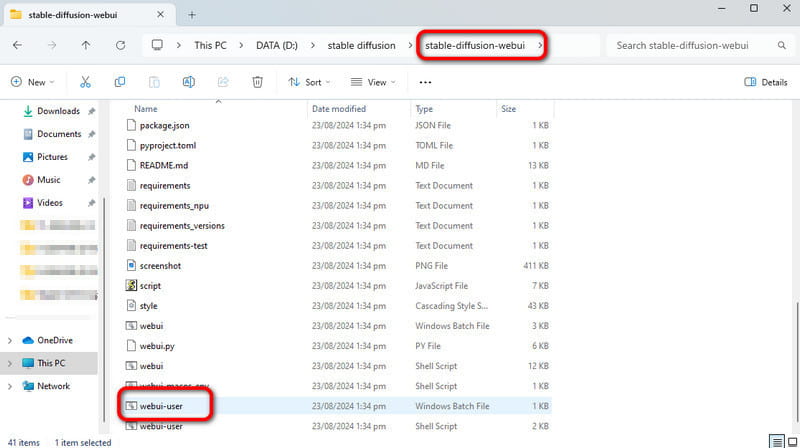
Step 6. Finally, go to the Stable Diffusion webui folder and double-click the webui-user option. When the CMD provides the link, copy and paste it to your browser. With that, you can already have the tool for the image generation procedure.
Installing the software is time-consuming, right? So, if you want to check the tool’s capability, you can try its web version, DreamStudio AI. This tool lets you generate images, making it an amazing AI text-based photo maker.
How to Use Stable Diffusion
Step 1. After accessing the tool, you can proceed to the image-creation process. Go to the txt2img section and insert the text prompts you want to transform into images.
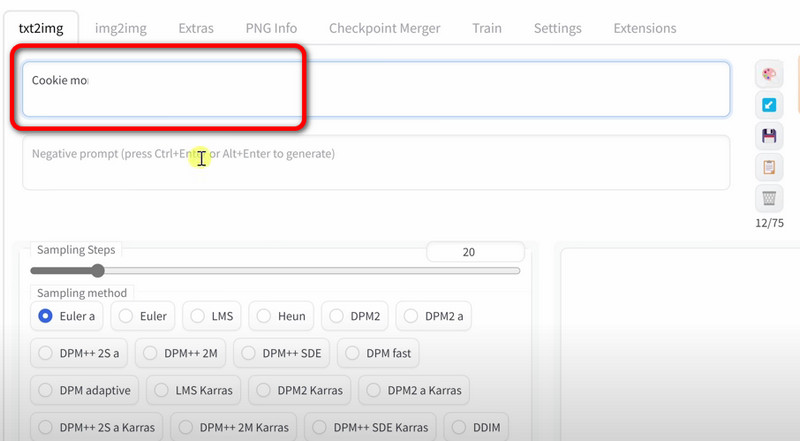
Step 2. Click the Generate button after inserting the text prompts. Then, wait for the process.
Step 3. After the generation process, click the Save button to save the generated image on your computer.

How to Train Stable Diffusion
Training the tool is necessary, especially if you want to generate images with exceptional results. We can provide the ideal training method. Read the process below to learn the details.
Model Fine-Tuning
With a domain dataset in place, you can already customize the model. When fine-tuning, you can train various parameters, including the number of epochs, learning, batch size, and more. You can start with smaller batches, like eight images, to ensure loss stabilizes smoothly.
Evaluation
After the previous step, you can go to the evaluation. You have to evaluate the tool’s performance, especially in terms of accuracy. It can be done by comparing the model’s prediction using various metrics. These are Mean Absolute Error, Mean Squared Error, Root Mean Squared Error, and more.
Deployment
Export the weights of the highest-performing checkpoint from the training for production readiness. Techniques can be used to upgrade models. With this training, you can ensure an excellent output when using the tool to create engaging images.
How to Save Stable Diffusion Setting
Step 1. Go to the Setting section from the tool’s top interface.
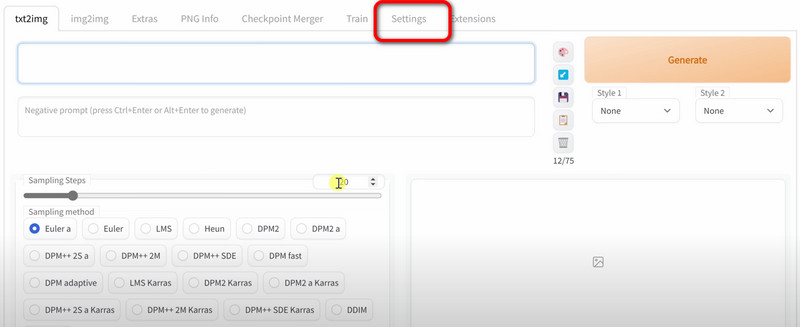
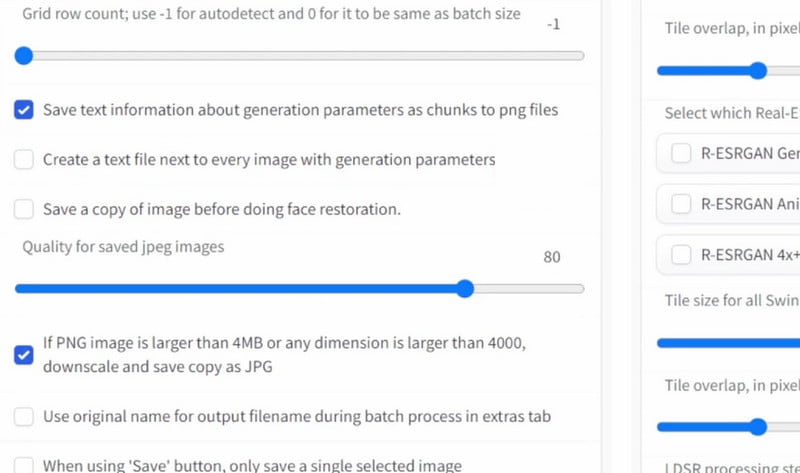
Step 2. Various options will appear on your screen. You can check some boxes and make some changes to various options.
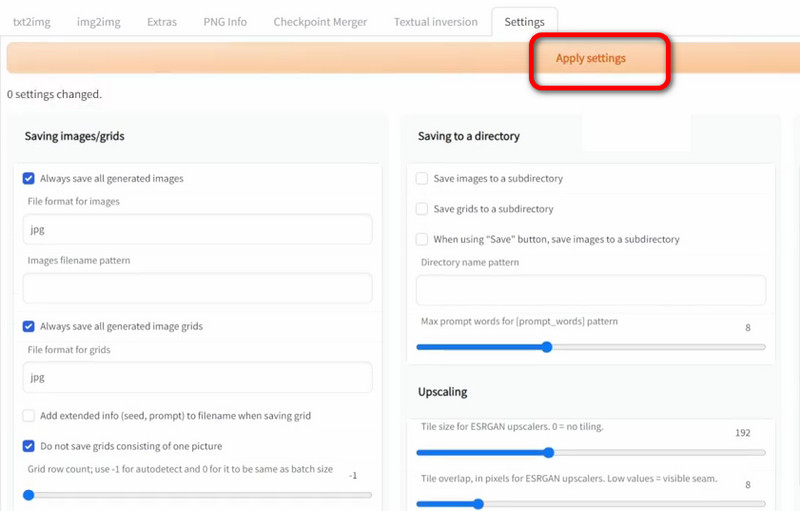
Step 3. When you are done tweaking various options, you can proceed with saving the Setting by clicking the Apply button..
How to View Prompt History on Stable Diffusion
Step 1. Go to the PNG Info option and insert the image you have generated before by clicking the Upload option.
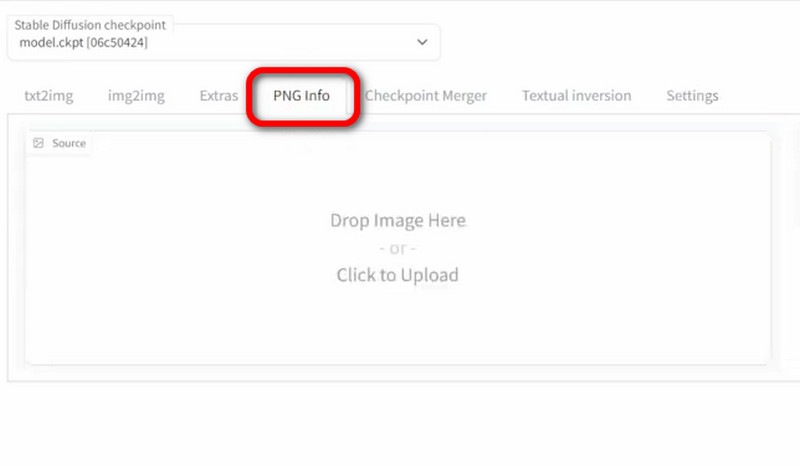
Step 2. After that, the tool will automatically send the prompt to the right interface. You can then access the prompt history.

Part 4. Bottom Line
As for my final verdict, I was surprised by this tool. It can give me all the important functions I need. Plus, by inserting a prompt, I can also make a white background for my image. After experiencing the tool, I can tell that you can rely on it to get an astonishing output with a high accuracy level. The only thing I don’t like here is that the tool is challenging to install. It requires various prerequisites and a long process.
Part 5. Bonus: Outstanding Tool to Enhance Generated Images
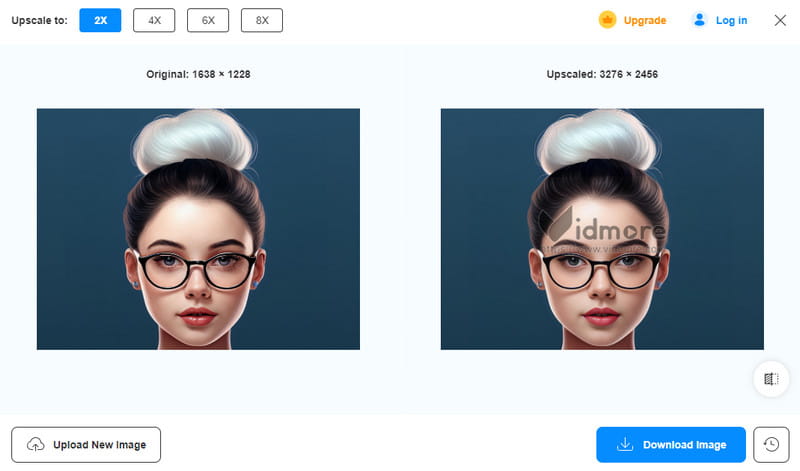
After using the Stable Diffusion AI Art Generator, it is best to upscale it immediately to get a better image. To upscale your generated images, use the Vidmore Free Image Upscaler Online. With this tool’s upscaling function, you can upscale the image up to 8× better. Plus, it features a simple user interface. With that, you can expect hassle-free methods to enhance your images. Aside from that, besides upscaling generated images, you can even rely on this tool to polish your blurry images. So, if you need an excellent online tool that can enhance your photo magically, use this tool immediately.
Part 6. FAQs about What is Stable Diffusion
Is stable diffusion free?
Yes, it is. Stable Diffusion is an open-source image generator. With that, you can use the program to generate images without paying a penny.
What is the best prompt for Stable Diffusion?
There are various things to consider when inserting a prompt. You must be direct and clear when adding a prompt. This increases the chance of getting accurate images after the process.
What is the controversy with Stable Diffusion?
Various issues have emerged after the launch of Stable Diffusion 3, including a bizarre human figure and complicated fingers. With this kind of output, users may doubt the tool's capability of generating images.
Conclusion
This review provides all the information about Stable Diffusion. It also includes the method for generating images, installing the tool, saving settings, and more. Plus, if you want to upscale your images, try using the Vidmore Free Image Upscaler Online. We recommend this online tool since it can upscale your image 8× better, which you can’t find in other tools.
