Resize Image in Illustrator With the Assistance of 3 Tools
Sometimes the size of specific photographs prevents them from being able to be incorporated into your work. What should be done if the photos do not conform to the size requirements? You resize them! However, while resizing the photographs, you need to be careful not to distort them in any way. With that, you can use Adobe Illustrator. This post will teach you how to resize an image in Illustrator. Follow the steps below and the alternative tools that will help you resize your photographs.


Part 1. How to Resize Image in Illustrator
Illustrator is desktop software, so you'll need to install it on your computer to resize the image. If you download the tool from Adobe's main website, you may rest assured that it is virus-free. You can now follow these instructions after installing the software on your desktop.
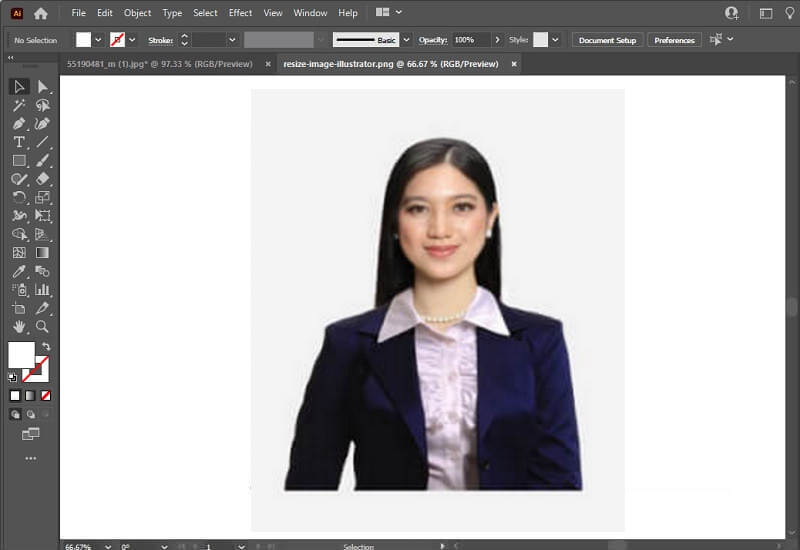
Step 1: To begin adjusting the proportions of an image using Illustrator, we must first open the image. Go to the File menu and select the Open button to complete this. Find the image you want to open on your hard drive, then choose to open it.
Step 2: To choose an area of an opened picture, use the Selection Tool and the mouse. After selecting, you'll see resizing bars on the image's edges and sides. You may resize your picture and perform a range of other transformations to it with the help of these transformation handles. You can prevent the aspect ratio of your picture from changing when you resize it by clicking and holding the Shift key on your keyboard. It works regardless of whatever transformation handle you use. After you have adjusted the picture size to your satisfaction, you may let go of the mouse button.
Step 3: Finally, with the picture selected using the Selection Tool, right-click it and pick Export selection from the menu that appears. Select the folder icon in the Export area to choose a destination on your computer for the resized picture. When ready, choose the picture you want to resize, and click the Export Asset option. After saving the picture, you may access it wherever you put it on your hard drive.
Part 2. Alternative Ways to Resize Images
Vidmore Free Image Upscaler
Suppose you need an alternative to Adobe Illustrator to resize photos for use on the web. In that case, Vidmore Free Image Upscaler Online is currently the most acceptable option. If you were to use this online tool instead of Illustrator, you wouldn't have to commit each step to memory as you would if you were using Illustrator. And scaling the picture would be less of a challenge. Apart from Illustrator, this tool doesn't need you to install anything on your computer before you can use it. It's just hosted on a website that millions of people can access. We've included instructions below if you're curious about how to utilize this resource.
Step 1: As we indicated, you can easily find this instrument by web searching. It takes you straight to Vidmore's online resizer. To upload the picture, you want to resize, use the Upload Image button. A directory will open, inside which you may either browse for the desired file or dump it.
Try Image Upscaler Now!
- Improve photo quality.
- Enlarge picture to 2X, 4X, 6X, 8X.
- Restore old image, unblur photo, etc.

Step 2: Simply by uploading the file, the program will immediately begin using AI to identify what the picture is. The picture you wish to resize now has a drop-down menu where you may choose the Magnification mode you like. It is advisable to try them all to choose the one that best compliments your persona.
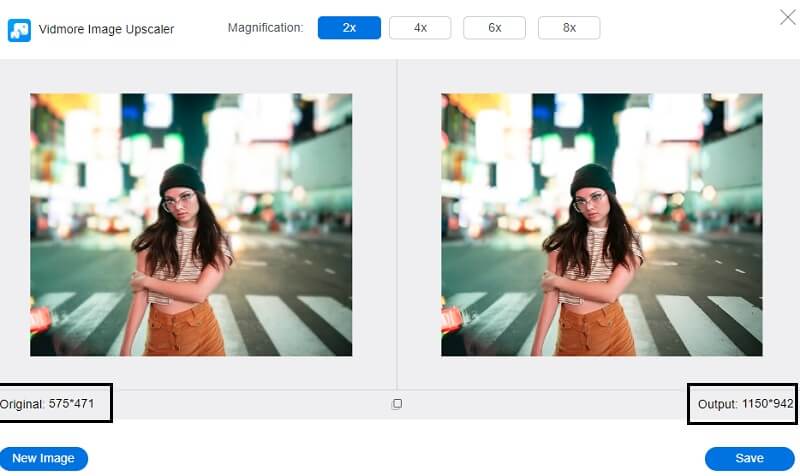
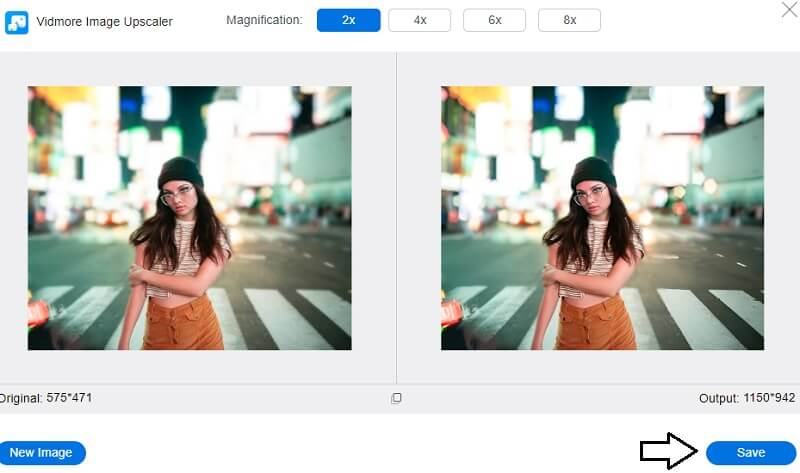
Step 3: When you've settled on the perfect dimensions for your picture, click the Save button to have your changes exported.
2. Photo Resizer
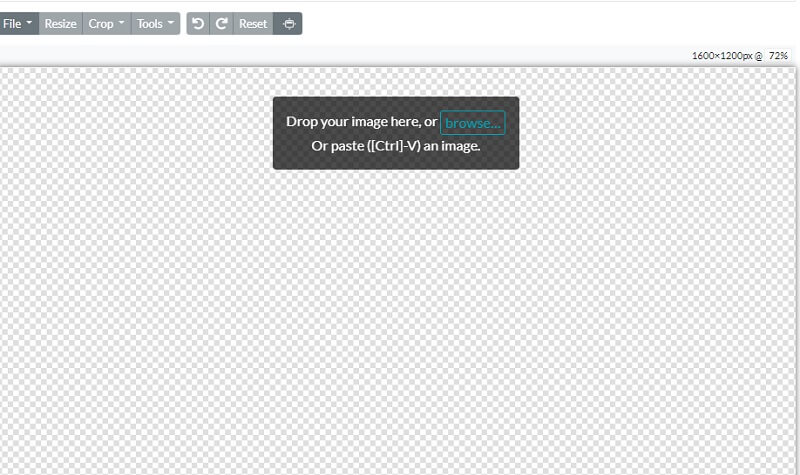
If you need to resize your photographs, Photo Resizer is a great program that you may use. The software enables you to do various picture editing activities, such as cropping, resizing, and adjusting the contrast. You will have the ability to crop your just uploaded picture using this tool. You also have the option to resize the picture by specifying the parameters of the new size you want it to be. You will have the option to see the image once it has been processed, and then you can save it in the image format of your choice.
Step 1: Click the Browse option to locate the picture on your computer, then add it to the Photo Resizer. Boost the number of options seen in the Crop pull-down. Options like profile and cover photos will now be visible in the user interface. Pick the size that strikes you the most.
Step 2: If you want to provide your values for height and width, you'll need to click the Resize button. Click the Apply button to make sure the settings are correct.
Step 3: To save the picture to your computer, click Open File and then pick Same from the selection that appears.
3. PicMonkey
BeFunky stands out as a one-of-a-kind online platform for modifying pictures because it enables amateur and professional photographers to resize their shots. You can take manual control of the lighting in your image, enabling you to adjust the exposure brightness of your snapshot. You may also use the picture enhancer, which can potentially correct any problems with your photographs with a single click. Choosing this method may help you save time. It's a great way to make simultaneous changes to your image's size.
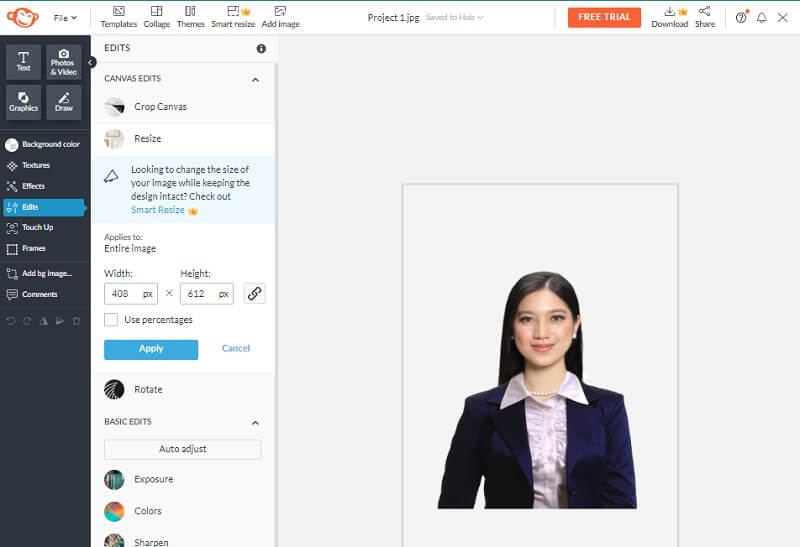
Step 1: To get started with the Photo Editor, you may bring a photo of your choice by selecting the Open button. You may also use the interface's drag-and-drop feature to import a picture rapidly. This option is available as an alternative. To resize the image, go to the Edit menu on the left side of the screen and choose the Resize option.
Step 2: Adjust the picture's scale or pixel count to achieve the desired changes in size if you want to enlarge or downsize the image. You may adjust the size in discrete pixels by tapping the arrow buttons next to the Width and Height labels. Instead of working with percentages, you may use the up and down arrows next to the X and Y labels.
Step 3: You may want to examine the photo using the crop feature to see if it is becoming misshapen before resizing it to the required number of pixels. After that, change the pixel size as necessary to get the desired level of resolution.
Part 3. FAQs About Resizing Image in Illustrator
Is Adobe Illustrator a paid program?
You may get a free trial of Illustrator that lasts for seven days. The fully functional, official app version is included in the free trial. It incorporates all of the new features and improvements included in the most recent version of Illustrator.
Which one is better, Illustrator or Photoshop?
When it comes to producing crisp, graphical graphics, Illustrator is your best pick, whereas Photoshop is excellent for photo-based illustrations.
Does a Mac version of Illustrator exist?
Yes, you can make one of the most professional-looking graphic designs for your presentation, company, artwork, or any other purpose using the Mac edition of Adobe Illustrator. And Mac is available for purchase.
Conclusions
The question on how to resize an image in Illustrator is solved. But if you are challenged to change the size of images, you can count on alternative tools. And speaking of alternative options, Vidmore Free Image Upscaler Online is a must-try!
