Discover PNG Size Reducer [Detailed Review + Steps]
A Portable Network Graphic (PNG) is a raster image file usually used for a website. It is popular online because it can handle graphics with transparent or semi-transparent backgrounds. This image file is a lossless format, often used in photos you will see all over the internet. Did you know that this image format can be compressed?
If you plan to compress PNG files and search for the PNG compressor you can access, you landed on the right page. This post will present several compressors to help you accomplish your desired image file size. With that, you can improve website speed, save storage space, and for easy-sharing. So without any further discussion, proceed to the following compressors.

PAGE CONTENT
Before writing, how we test software for posts:
Disclaimer: All the content on our website is written by humans in our editorial team. Before writing, we do deep research about the topic. Then, it takes us 1-2 days to select and test tools. We test software from device and system requirements, functions, use experience, etc. To make our test more comprehensive, we also view review websites, like G2, Trustpilot, etc., to gather real users' experiences for reference.
Part 1. Cut to The Chase
| Supported Operating Systems | Supported Image Formats | Pricing | Compression Process | Usability | Interface | Compression Percentage | |
| Vidmore Free Image Compressor Online | Web-based | PNG, JEPG, JPG, SVG, and GIF. | It automatically compresses the images once uploaded. | Satisfactory | It is straightforward. | 80% | |
| CloudConvert | Web-based | JPG and PNG | Free | It automatically compresses the images once imported. | Satisfactory | It is straightforward. | 70% |
| PhotoShop | Mac and Windows | PNG, GIF, and GIF | Free and Paid | It does not automatically compress the images but allows users to modify the parameters. | Satisfactory | It is designed for advanced users. | 80% |
| Radical Image Optimization Tool (Riot) | Windows | PNG, JPEG, JPG, and GIF. | Free | It does not automatically compress the images but enables users to select their preferred image height and width. | Satisfactory | It could be more straightforward. | 80% |
| Image Compressor: Resize Image | Android | PNG, JPG, JPEG, and GIF. | Free and Paid | It provides two options to compress images: auto and let users enter their preferred image file size. | Satisfactory | It could be more straightforward. | 90% |
Part 2. Vidmore Free Image Compressor Online
Vidmore Free Image Compressor Online is a free image compressor that can access straight online. It has an intuitive interface that makes it easier for first-time users or even professionals to use. With the help of this web-based image compressor, you can share images quickly, free up disk storage, and increase website speed.
Vidmore Free Image Compressor Online supports JPEG, SV, GIF, and PNG files. This PNG compressor can help you accomplish your desired smaller image file size. Your PNG files can be optimized, reduce the file size by up to 80%, and maintain the image condition. Also, you can upload numerous images simultaneously. It supports batch image compression and enables you to add images up to 40 and 5 megabytes each. Besides that, it compressed PNG files up to 60% of the original size without sacrificing the features and quality.
Pros
◆ It can compress image file size in seconds without limitation.
◆ It does not ask you to sign in to your account.
◆ It removes your images from the server automatically after compression.
◆ It compresses and optimizes PNG files by up to 80% and maintains high-image quality.
◆ It compresses images up to 60% of the original size without losing the features and quality.
Cons
◆ A fast internet connection is needed for a fast compression process.
Here, we will present you with a step-by-step procedure on how to compress PNG using Vidmore Free Image Compressor Online:
Step 1. Go to Vidmore Free Image Compressor Online
First and foremost, go to Vidmore Free Image Compressor Online’s official website using your browser.
Step 2. Upload PNG Files
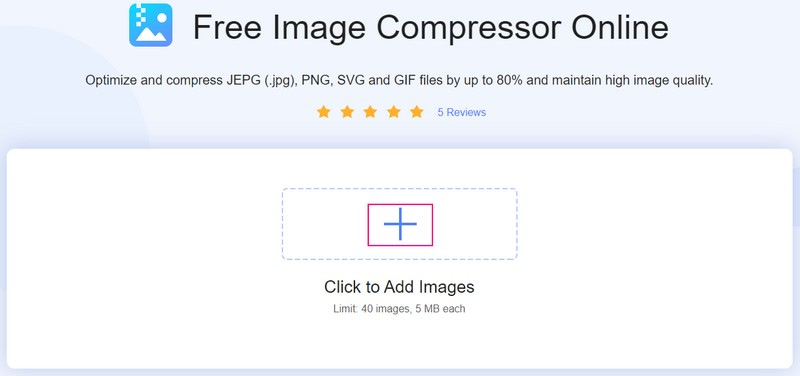
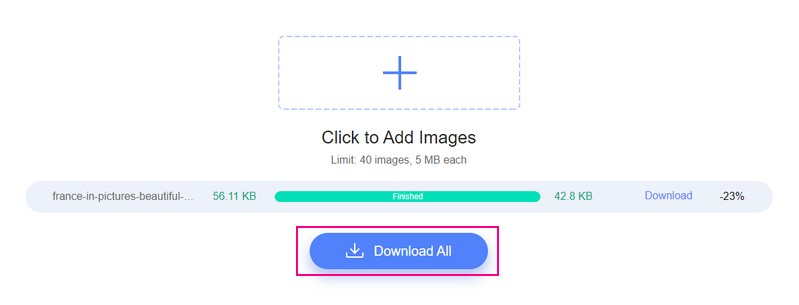
Hit the (+) icon, and the web-based image compressor will automatically open your desktop folder. Then, select the PNG files you want to undergo compression, and these PNG files will be reduced afterward.
Step 3. Download Compressed PNG Files
After adding the PNG files; they automatically go through the uploading and compressing process. On your screen, you will see the word Finished covered in green beside your PNG file. It is a hint that the web-based image compressor successfully compressed your PNG files.
Click the Download All button to save your reduced PNG files to your computer. After that, a folder will appear where your compressed PNG files are located.
Part 3. CloudConvert
CloudConvert primarily works as an online file converter that supports more than 200 formats. Besides the converter function, it is also capable of compressing your images. The images that it supports are JPG and PNG image files, which can be reduced by size. The platform can reduce the size by up to 70% while retaining high-quality images depending on the input file. This web-based image compressor preserves alpha transparency. It can help you reduce PNG files according to the website’s standard image size.
Pros
◆ It enables users to add multiple image files at once.
◆ It reduces image file size by up to 70% while retaining the image’s features and quality.
◆ It does not ask you to sign up or log in to your account.
Cons
◆ It can only compress limited image file formats.
◆ A fast internet connection is needed for a fast compression process.
Here, we will present you with a step-by-step procedure to compress PNG online using CloudConvert:
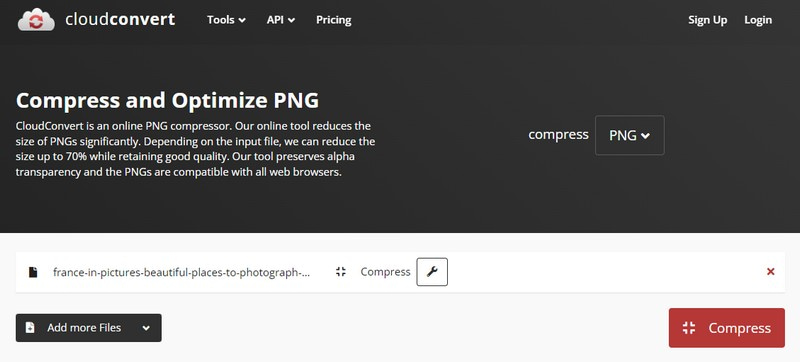
Step 1. Go to Compress PNG - Cloud Convert’s official website using your browser. After that, you will be directed to the main compression section.
Step 2. Tap the + Select File button to open your desktop folder, and select the PNG files you want to undergo the compression process. If you want to add PNG files, press the + Add more Files button below your uploaded file. Next, click the Wrench icon, and enter your desired quality number.
Step 3. Press the Compress button, and the compression process will begin. Once done, press the Download button to save your compressed PNG file output on your desktop folder.
Part 4. Photoshop
Photoshop is famous for image creation, graphic design, and photo editing. It provides numerous editing functions for pixel-based images, raster graphics, and vector graphics. It supports several image file formats that can be converted into another output format. Besides that, it can compress image files and make them smaller. The image file format it supports is JPG, GIF, and PNG, which can be reduced using the platform. Photoshop has a unique algorithm to compress images and exerts high-tech compression technology to reduce PNG file size.
Pros
◆ It has a one-month free trial.
◆ It works even without an internet connection.
◆ It is accessible on Mac and Windows systems.
◆ It supports batch-image compression.
◆ It has numerous basic and advanced editing options.
Cons
◆ The interface needs to be narrower for beginners.
◆ It is not free; you must buy the premium plan to enjoy the program’s features.
Here, we will present a step-by-step process to reduce PNG file size using Photoshop:
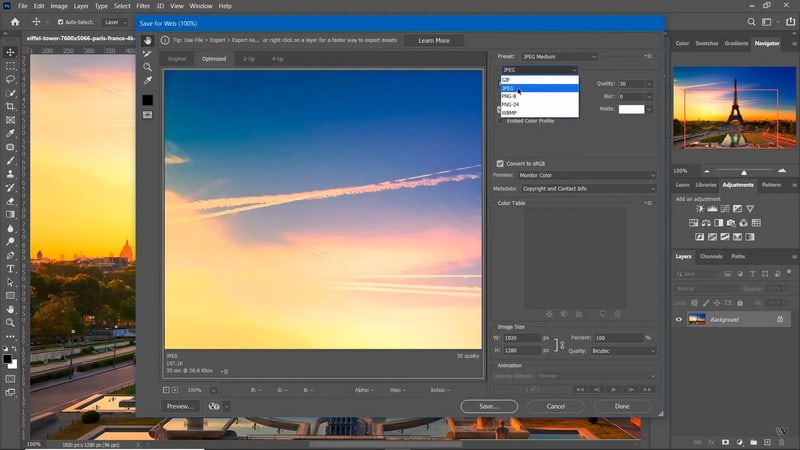
Step 1. Open the platform, head to the File tab from the top menu bar, and select the Open button. It will open your computer folder and select the PNG files you want to undergo the compression process.
Step 2. Return to the File tab, and select the Save for Web & Devices button to compress the PNG files.
Step 3. Start modifying the other parameters, such as the Image Size, Quality, Percent, Preset, and Optimized. With the help of these parameters, you can maintain the quality of your PNG files.
Head to the 4-Up button to preview the PNG files and the difference between the quality and file size comparison. In addition, if you want to accomplish a specific size, you can estimate the percentage accordingly.
Step 4. Tap the Select download speed button to modify the Size/Download Time. You will get an estimate of how long it will take to download your PNG files at the selected Size/Download Time. After that, click the Save button to compress the PNG files using the platform. Save the reduced PNG file size to another folder to replace the original one.
Part 5. Riot
Radical Image Optimization Tool (RIOT) is an easy-to-use and efficient freeware compression utility for JPEG, GIF, and PNG. This program can help you modify compression parameters while visually keeping a minimum file size. It uses a side-by-side screen to view and compare the optimized and compressed to the other one in real time. Besides that, you can see the resulting file size at the top of the interface. On top of that, it supports batch image compression, which can help you save time.
Pros
◆ It automatically offers compression options when you add the images.
◆ It can compress large image file sizes in bulk.
◆ It allows users to set their preferred image height and width.
◆ It has a dual-pane structure comparing the original image to the compressed and optimized result.
Cons
◆ It is designed for professional users.
◆ It is only available for Windows systems.
◆ The only method to add images is by drag and drop.
Here, we will present a step-by-step procedure to shrink PNG using the Radical Image Optimization Tool:
Step 1. Download and Install the program from the official website to have complete access.
Step 2. Go to your computer folder, open it, and locate the PNG files you want to undergo compression. Once you have located the PNG files, drag them to the program on the right preview screen.
Step 3. A box will appear on your screen with various options to reduce the image file size. Enter your desired Height and Width size, and enter a smaller image file size than the original one. Besides that, select whether Percent or Pixels under the Unit option. Also, it is up to you to Keep the Aspect Ratio by putting a checkmark beside it. Once done, press the OK button to save the changes.
Step 4. To see the details closely, use the Zoom option, and drag your mouse around the image. Once done, head to the Save button, and it will ask you if you want to replace the original image. Select Yes, and locate the newly compressed PNG file in your computer folder.
Part 6: Image Compressor: Resize Image
Image Compressor: Resize Image is a PNG size reducer for Android devices. It supports image files such as JPG, JPEG, GIF, and PNG formats. This compressor provides two options for compressing PNG files: auto and compressing the image to a specified file size. The auto option compresses the images to the application’s standard, and the other option enables users to enter a specific size. On top of that, it compresses and optimizes your PNG files by 70-90%. The effect is almost visible, but the image file size is smaller.
Pros
◆ It supports batch image compression.
◆ It provides two options to compress images.
◆ It enables users to change the image format to another.
Cons
◆ It is only available on Android phones.
◆ A lot of ads are showing on the screen.
◆ Advanced compression functions need to be avail.
Here, we will present you with a step-by-step procedure on how to shrink PNG file size using the Image Compressor: Resize Image:
Step 1. Download and Install the application on Google Play Store.
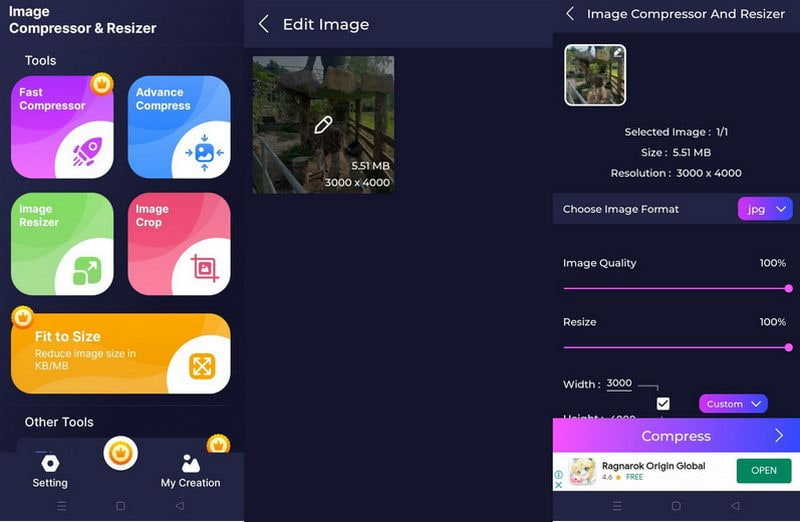
Step 2. Click the Compress Photos button to open your phone gallery, and choose the PNG files you want to compress. Next, select whether to Auto or Compressed under the Compress Mode option.
Step 3. Once satisfied, press the Compress button to start the process. After that, you will see the results of the before-image and after-image file sizes.
Part 7. FAQs about PNG Compressor
Does PNG reduce quality?
PNG files benefit from lossless compression, meaning no data is lost when the image is compressed. The quality will remain the same even if you edit and save the image files many times.
Why is PNG smaller than JPEG?
PNG is smaller than JPEG because of its different compression process. JPEG contains less data compared to PNG, which makes them smaller in size.
What is the best use for PNG?
PNG is ideal for all graphics containing solid colors and sharp edges. It is a good choice when you need to convert vector graphics into raster formats that cannot present vector graphics.
Conclusion
This post presented several PNG compressors you can count on. Aside from that, it provides simple ways to compress PNG files using the image compressors above. After that, you can have the smaller image file size you wish. But if you prefer to use a compressor that you can access for free, rely on Vidmore Free Image Compressor Online. It can help you compress your PNG files with simple clicks and hassle-free.
